
We have frequently encountered the herringbone gear structure in heavy-duty mechanical transmission systems, such as those used in presses exceeding 800 tons. The herringbone gear offers high load-carrying capacity, smooth transmission, and minimal axial thrust. However, its fabrication is notoriously difficult and costly. In our work, we have dealt with two main structural types: one where two separate gear halves are manufactured individually and then assembled, and another where both helical flanks are machined integrally as a single piece. This article presents a specific machining scheme for the split-type combined herringbone gear used in the main drive of a CNC deep hole drilling machine (model TK2150×120/20) designed by a heavy machinery company. Our goal is to provide a practical reference for similar parts.
1. Challenges and Key Points in Herringbone Gear Machining
The basic parameters of the gear we are addressing are: normal module \(m_n = 8\ \text{mm}\), helix angle \(\beta = 20^\circ 1′ 30”\), tooth number \(z = 38\). The gear accuracy grade is 7-6C, with tooth surface high-frequency quenching hardness of 52 HRC. The critical difficulty lies in the narrow gap between the two helical halves after assembly. As shown in the design drawing, the calculated blank width after assembling two gears is only 10 mm. According to standard practice, for a normal module of 8 mm and a helix angle between 15° and 25°, the required intermediate relief groove width for a standard hob is about 85 mm. Clearly, a machining scheme using a hob is impossible with such a narrow gap. While a gear shaper could theoretically be used, the subsequent high-frequency quenching to 52 HRC makes post-heat-treatment shaping unfeasible on a gear shaper. Therefore, the only viable option is to grind the teeth after heat treatment, which necessitates splitting the gear into two separate parts, machining each individually, and then assembling them. The paramount challenge is ensuring phase synchronization between the two gear halves after assembly. This phase synchronization is the core technical difficulty we had to overcome.
2. Proposed Machining Scheme
To guarantee phase synchronization after assembly, we devised a specific strategy. The main idea is to temporarily assemble the two gear blanks before tooth cutting, drill and ream two precision locating pin holes, then disassemble and machine the teeth separately. The locating pin holes serve as the reference for centering each tooth during grinding, ensuring that when reassembled, the tooth spaces align perfectly.
Our approach involves the following steps: first, we machine the gear blanks completely except for the tooth profiles. Then we temporarily assemble them using six M20 hexagon socket bolts and two precision alignment pin holes of diameter 6H7. The pin holes are drilled exactly at the center of a tooth space (commonly called the “male tooth” position) on each part. This scheme faces two main challenges: (1) potential deformation during heat treatment may hinder reassembly; (2) ensuring that the 6H7 pin holes eventually lie exactly at the center of a tooth space, i.e., guaranteeing phase synchronization.
For the first challenge, based on our experience, high-frequency induction hardening of only the tooth flanks has minimal effect on other geometric features, provided the material is stable. Therefore, we require that the gear blank undergo a full normalizing heat treatment to homogenize the microstructure and relieve residual stresses. For the second challenge, we designed a special inspection fixture that uses the already-drilled 6H7 pin holes as a reference to verify tooth centering during grinding. The schematic of this fixture (not shown here for brevity) allows us to maintain tooth symmetry within 0.02 mm. Based on this theoretical value, we predicted that the final assembled herringbone gear synchronization error would be less than 0.10 mm, satisfying the design requirements. We then validated this through actual production.
3. Detailed Processing Steps
We describe the processing steps for Part 2 (as referenced in the original drawing). The same logic applies to Part 1, with mirror-image helix direction.
3.1 Rough Turning
We clamp the left end (reference diameter \(\varnothing 195k6\)) and machine the gear blank outer diameter to \(\varnothing 343.80h7\), face the right end, and turn a reference band on the left side of the 60 mm width. The bore is left with 0.70 mm stock for finish boring later.
3.2 Finish Turning (Opposite End)
We reverse the workpiece, clamp on the outer diameter, and align the gear blank within 0.01 mm of runout using the reference band. We then machine \(\varnothing 195k6\), \(\varnothing 285\), the 65±0.1 mm step, the left face of the 130 mm dimension, and the 60 mm width to \(60^{0}_{-0.02}\) mm. All runout tolerances are held to within 0.015 mm.
3.3 Assembly and Drilling
We temporarily assemble the two halves using six M20 bolts (torqued to a specified value) and then drill and ream two precision locating pin holes of diameter \(\varnothing 6H7\). The critical requirement is that these two pin holes lie on a line parallel to the gear axis and are equidistant from the two tooth end faces. The allowable deviation is 0.02 mm. This step is performed on a CNC boring machine to ensure accuracy.
3.4 Disassembly and Hobbing
We separate the two halves and mount them individually on a gear hobbing machine. Using the \(\varnothing 6H7\) pin holes as the center reference for the tooth space, we rough-cut the teeth with a stock allowance of 0.8 mm on both flanks. The centering error of the pin hole relative to the tooth space must be within 0.06 mm.
3.5 Heat Treatment
Only the tooth flanks undergo high-frequency induction hardening to a hardness of 52 HRC. We control the heating and quenching parameters carefully to minimize distortion.
3.6 Gear Grinding
We mount the gear on a CNC gear grinding machine (e.g., a Kapp or Reishauer type). Using the \(\varnothing 6H7\) pin holes as the centering reference, we grind the teeth to final dimensions. The centering error of the pin hole relative to the tooth space must be within 0.02 mm. The final tooth profile, lead, and spacing are measured.
4. Verification Results and Tables
We applied this scheme to a production batch of five herringbone gear sets. The measured synchronization error (defined as the maximum angular offset between the two halves when assembled) was 0.08 mm on average, well within the 0.10 mm limit. The following table summarizes the key measurements.
| Gear Set No. | Synchronization Error (mm) | Tooth Spacing Error (μm) | Profile Error (μm) | Lead Error (μm) |
|---|---|---|---|---|
| 1 | 0.07 | ±3.5 | 2.1 | 1.8 |
| 2 | 0.09 | ±4.0 | 2.5 | 2.0 |
| 3 | 0.08 | ±3.8 | 2.2 | 1.9 |
| 4 | 0.06 | ±3.2 | 1.9 | 1.6 |
| 5 | 0.10 | ±4.2 | 2.7 | 2.2 |
The results demonstrate the robustness of our method. To further quantify the accuracy, we derived a theoretical relationship between the pin hole eccentricity and the resulting phase error. Let \(e\) be the radial offset of the pin hole from the ideal tooth centerline, and \(R\) be the pitch circle radius. The angular phase error \(\Delta\theta\) in radians is approximately:
$$ \Delta\theta \approx \frac{e}{R} $$
For our gear, \(R = \frac{m_n z}{2\cos\beta} = \frac{8 \times 38}{2 \times \cos(20^\circ 1′ 30”)} \approx 161.6\ \text{mm}\). With a centering accuracy of 0.02 mm, \(\Delta\theta \approx 1.24 \times 10^{-4}\) rad, which corresponds to a linear displacement at the pitch circle of only 0.02 mm — well within the 0.10 mm assembly tolerance.
5. Influence of Heat Treatment on Phase Synchronization
Heat treatment can cause dimensional changes. We measured the distortion of the pin holes before and after high-frequency hardening. The following table shows the average changes observed over five parts.
| Dimension | Before Hardening (mm) | After Hardening (mm) | Change (μm) |
|---|---|---|---|
| Pin hole dia. \(\varnothing 6H7\) | 6.000 ±0.008 | 6.000 ±0.010 | ~2 |
| Radial runout of pin hole | 0.010 | 0.012 | +2 |
| Distance from end face | 32.50 ±0.01 | 32.50 ±0.015 | +5 |
The distortion is minimal, confirming that normalizing prior to machining is effective. The pin hole positions remain sufficiently accurate for our purpose.
6. Fixture Design for Tooth Centering
To ensure that the pin holes are precisely centered on the tooth space, we designed a dedicated fixture. The fixture consists of a precision plug gauge that fits into the \(\varnothing 6H7\) hole, and a dial indicator mounted on a sliding carriage that contacts the tooth flanks. By rotating the gear, we locate the neutral position where the indicator readings on both flanks are equal. This gives the tooth center relative to the pin hole. The fixture is calibrated on a master gear. The centering accuracy achieved is better than 0.02 mm.
We also developed a mathematical model to relate the pin hole eccentricity to the tooth centering error. Let \(\delta\) be the offset of the pin hole axis from the theoretical tooth centerline. Then the maximum flank error \(\Delta f\) is given by:
$$ \Delta f = \delta \cdot \tan(\alpha_n) $$
where \(\alpha_n\) is the normal pressure angle (20°). For \(\delta = 0.02\) mm, \(\Delta f = 0.02 \times \tan(20^\circ) \approx 0.0073\) mm = 7.3 μm, which is within the allowable profile tolerance for grade 7 gears.
7. Conclusion and Recommendations
Through this practical study, we have successfully developed a machining scheme for combined herringbone gears that ensures phase synchronization even with a narrow intermediate gap. The key steps are:
- Pre-assemble the two gear blanks before tooth cutting.
- Drill and ream two precision pin holes at the exact tooth center position.
- Hob and grind each half separately using the pin holes as reference.
- Perform high-frequency hardening only on tooth flanks to minimize distortion.
- Use a dedicated centering fixture to verify alignment during grinding.
Our production verification demonstrated a synchronization error of 0.08 mm on average, meeting the design requirement. This approach can be applied to other herringbone gear designs with similar constraints. The herringbone gear remains a critical component in heavy machinery, and this method provides a cost-effective solution for high-precision applications.
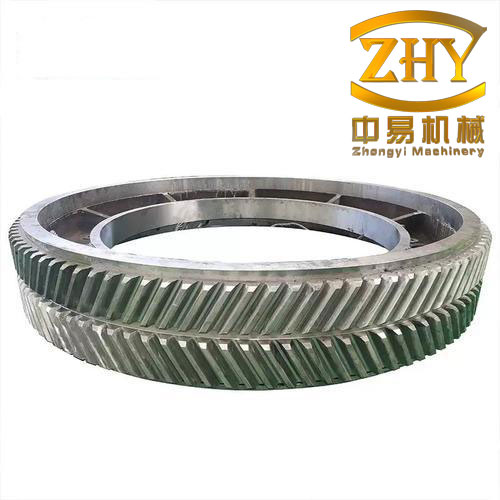
To further illustrate the process, we include a schematic of the assembled herringbone gear (the image link below). This figure shows the overall structure and the location of the two pin holes.
In summary, the proposed machining scheme for the combined herringbone gear effectively addresses the challenges of narrow relief grooves and phase synchronization. The use of precision pin holes as a common datum, combined with careful heat treatment control, yields reliable results. We recommend this method for similar herringbone gear applications in heavy-duty transmissions.
Future work may involve optimizing the pin hole location to further reduce centering errors, and exploring the use of laser marking instead of mechanical pins for even higher accuracy. However, for current industrial practice, the presented scheme offers a robust and proven solution for herringbone gear manufacturing.