
Why the Tooth Trace Decides Performance
A straight bevel gear engages with a contact line parallel to the pitch element, so the full face width enters mesh at once and each pitch transition is absorbed by a single tooth pair. Replacing the straight trace with a circular arc changes that picture. The contact line becomes inclined to the pitch element, engagement begins near the heel of one flank and sweeps diagonally toward the toe, and successive tooth pairs overlap in both the profile and the length direction. The result is the behaviour that made spiral bevel gears the default choice for axle drives, turboprop reducers and mill pinions: at equal envelope, a larger contact ratio, a lower load per unit contact length, and a smoother handover of load between teeth.
The curved trace is also what makes the gear hard to design. A spiral bevel flank is not a simple swept profile; it is generated by a rotating cutter head whose blades envelop the tooth surface, and its running behaviour depends on machine settings, cutter geometry and mounting position as much as on the nominal tooth numbers. The design tradition that grew around this problem is usually divided into four stages: the local conjugate principle adopted by Gleason from the 1920s, in which the gear flank is cut first and the pinion flank is solved as its conjugate; Litvin’s local synthesis, which controls the second-order contact parameters directly instead of relying on repeated trial cuts; third-order contact formulations that extend control to the derivative of curvature and to possible third-order defects; and the six-axis UMC/UMG generation methods that removed the need for lapping after grinding.
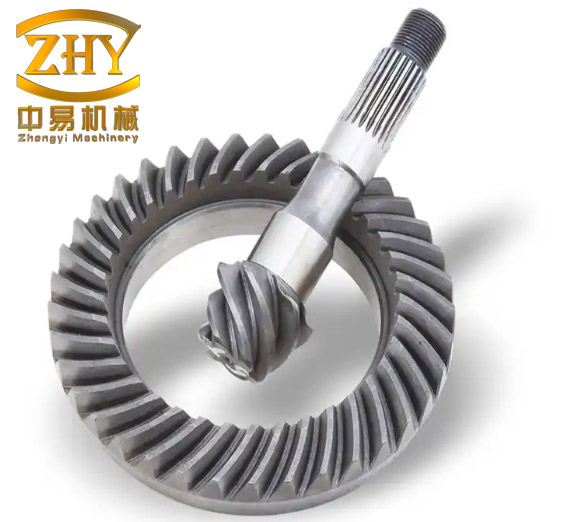
Whoever has to release a gear pair nonetheless needs five practical answers: how to build a geometrically faithful solid model quickly, what the flank contact stress and root bending stress are under rated torque, how many tooth pairs actually share the load, how large the transmission error becomes, and whether the natural frequencies leave the design exposed to resonance. The sections below follow that sequence for a 15/46-tooth pair with a 6 mm module and a 35° spiral angle.
The Spherical Involute as the Generative Curve
Relative motion between two bevel gears is rolling of two pitch cones that share an apex, and every point of the moving body stays on a sphere centred at that apex. The conjugate profile is therefore the involute of a curve on a sphere. The construction is the spherical analogue of the planar case: a base cone rolls without slip on a plane tangent to it, and since the tangent plane touches the sphere along a great circle, that great circle rolls on the base circle of the cone. A point held at distance $R$ from the apex within the rolling plane traces the spherical involute, which is the theoretical flank profile of the spiral bevel tooth.
The base cone half-angle $\delta_b$ follows from the pitch cone angle $\delta$ and the pressure angle $\alpha$:
$$\sin\delta_b=\sin\delta\cos\alpha$$
For the 15-tooth pinion, $\delta_1=\arctan(15/46)=18.06°$, and with the standard 20° pressure angle the base cone half-angle is $\delta_{b1}=16.94°$. With the roll angle $\theta$ measured inside the tangent plane, a point of the involute in Cartesian coordinates on the sphere is
$$\begin{cases}X=R\sin\omega\cos\sigma\\[2pt] Y=R\sin\omega\sin\sigma\\[2pt] Z=R\cos\omega\end{cases},\qquad \omega=\delta_b+\theta,\qquad \sigma=\frac{\theta}{\sin\delta_b}$$
where $\omega$ is the polar angle from the cone axis and $\sigma$ the azimuth measured from the generator at which rolling started. At $\theta=0$ the curve sits on the base circle ($\omega=\delta_b$); it crosses the pitch cone where $\omega=\delta$. Below the base cone the involute cannot be continued, so the flank is closed by a transition curve generated with a zero root offset, which keeps it tangent to the involute and avoids a step at the fillet.
Generating the Tooth-Length Curve from Cutter Kinematics
In the face-width direction the flank does not follow a straight generator but the trace left by the cutter head. Let $r_d$ be the cutter radius, $\beta_m$ the midpoint spiral angle and $R$ the outer cone distance; the distance $S$ from the cone apex to the cutter centre follows from the cosine rule in the plane of the cutter:
$$S^2=R^2+r_d^2-2Rr_d\sin\beta_m$$
The heel and the toe of the tooth subtend different central angles $S_1$ and $S_2$ at the cutter centre because they sit at radii $R$ and $R-B$, with $B$ the face width. Projected onto the pitch plane these angles become angles $\eta_1$ and $\eta_2$, whose spherical images give the rotations $K_1$ and $K_2$ of the two end sections:
$$K=\arcsin\!\left(\frac{\sin\eta}{\sin\delta}\right),\qquad K_{12}=K_1-K_2$$
Sweeping the cutter central angle from $S_1$ to $S_2$ and re-evaluating the radial distance $L=(S+r_d\cos S)/\cos\eta$ at each station traces the spiral tooth-length curve, while $K_{12}$ fixes the angular offset of the toe section relative to the heel section. Because the tooth is symmetric, the opposite flank is obtained by mirroring the azimuth $\sigma$; the tip and root arcs are generated in the same way from the addendum and dedendum angles, at outer radius $R$ and inner radius $R-B$.
From Curve Equations to a Parametric Solid
Building the solid from only the two end sections is inaccurate, because the flanks between heel and toe are then ruled rather than involute. The practical remedy is a family of auxiliary involutes distributed along the face width at radii $r=R-0.05nB$ for $n=1\ldots19$, which constrain the surface in the length direction and keep the interpolation error small. The resulting closed wireframe of a single tooth is lofted into surface patches through a curve-mesh operation, the patches are sewn into a solid tooth, the tooth is patterned around the axis, and the array is united with the blank before the bore, chamfers and edge trims are added.
The design data set used throughout is listed in Table 1. The tooth numbers are mutually prime and their sum exceeds 40; the face width of 40 mm stays below both 30% of the outer cone distance (43.5 mm) and ten times the module (60 mm), which keeps the tooth from becoming too slender at the toe.
| Parameter | Symbol | Value |
|---|---|---|
| Module | $m$ | 6 mm |
| Pressure angle | $\alpha$ | 20° |
| Pinion / gear tooth number | $z_1$ / $z_2$ | 15 / 46 |
| Shaft angle | $\Sigma$ | 90° |
| Face width | $B$ | 40 mm |
| Midpoint spiral angle | $\beta_m$ | 35° |
| Addendum coefficient | $h_a^*$ | 0.85 |
| Clearance coefficient | $c^*$ | 0.188 |
| Hand of spiral | — | pinion right, gear left |
| Pitch cone angle, pinion / gear | $\delta_1$ / $\delta_2$ | 18.06° / 71.94° |
| Base cone angle, pinion | $\delta_{b1}$ | 16.94° |
| Outer cone distance | $R$ | 145.2 mm |
| Transmission ratio | $i$ | 3.07 |
Rebuilding this chain by hand for every new tooth count is the bottleneck of the method, so the construction was encoded as a GRIP program inside UG. The script takes module, tooth numbers, spiral angle, pressure angle, face width and cutter radius as inputs, rebuilds the curves, patches and array, and returns a finished solid. Compiled to an executable module and called from the menu, it replaces hours of manual curve construction with a single parameter dialog and guarantees that every variant is generated by the same geometric rules.
Discretization and Contact Setup
Hexahedral elements were preferred over tetrahedra: at equal mesh density a free tetrahedral mesh exacts a considerably higher computational cost, and the tooth flank of a spiral bevel gear is exactly the kind of strongly twisted surface on which tetrahedra degrade. The solid is first split into single-tooth sectors, a structured quadrilateral mesh is laid on the flank with local density control, and the sector is swept into hexahedra with the linear reduced-integration element C3D8R (hourglass control active). One tooth is then patterned, and the duplicate nodes at the sector interfaces are merged with an equivalence tolerance of 10% of the smallest element; element quality is checked before the model is exported.
A sector of three to five teeth reproduces the loaded behaviour of the full wheel while keeping the problem tractable, and five teeth were retained here: element size 1 mm, 52,800 elements and 61,869 nodes. Rotational degrees of freedom do not exist on the hexahedral nodes, so a rigid reference point is placed on the axis and kinematically coupled to the bore surface and to the cut faces; torque and rotation are applied at that point and transmitted to the mesh.
Contact is defined as surface-to-surface with finite sliding, a hard normal behaviour that forbids penetration, and a penalty friction formulation with $\mu=0.1$. The pinion flank acts as the master surface and the gear flank as the slave, following the usual rules on relative stiffness, mesh density and convexity. The analysis runs in two general static steps with geometric nonlinearity active: the first gradually removes an initial interference fit to close the backlash and establish a stable flank contact without impulsive normal forces, and the second applies the torque. Increment controls are 0.01 initial, $1\times10^{-7}$ minimum, 0.1 maximum, up to 1000 increments over a 1 s step. This staging is what prevents the severe discontinuous iterations that arise when contact status changes abruptly between steps.
Static Contact Stress at Rated Torque
With 900 N·m applied to the gear, the equivalent contact stress peaks at 373.9 MPa on the gear flank and 314.1 MPa on the pinion flank (Table 2). The contact zone is elliptical, its long axis inclined to the face width, and the maximum sits near the ellipse centre. The root bending stress reaches 84.3 MPa in the gear and 117.2 MPa in the pinion, in a narrow ellipse located below the contact zone; away from the centre the stress falls quickly. The reversal between the two quantities is consistent with the geometry: the pinion has the shorter, more slender tooth and therefore the higher bending stress, while the gear flank carries the higher contact stress.
| Quantity | Pinion | Gear |
|---|---|---|
| Maximum contact stress (MPa) | 314.1 | 373.9 |
| Maximum root bending stress (MPa) | 117.2 | 84.3 |
Tracking a single tooth pair through a complete mesh cycle shows how the footprint migrates. On the gear the contact ellipse moves from the heel at the root to the toe at the tip, and the bending zone follows beneath it from the heel root to the toe root. On the pinion the footprint runs from the heel tip to the toe root, the mirror image required by conjugate action, with the same migration of the bending zone. The inclination of the ellipse is preserved throughout, which is the signature of the diagonal engagement produced by the spiral angle.
Load-Dependent Contact Ratio and Transmission Error
At zero load the actual contact ratio of a spiral bevel pair is one regardless of its design value, because the flanks touch along a line. Load flattens the contact into an ellipse, the elastic approach closes the gap to the neighbouring tooth pair, and the number of pairs sharing the torque rises. The design quantity is the resultant of the transverse and overlap components,
$$\varepsilon_\gamma=\sqrt{\varepsilon_\alpha^2+\varepsilon_\beta^2}$$
but the ratio that matters in service must be measured from the contact force history. A pair participates in mesh exactly while its normal contact force is non-zero, so if $T’$ is the duration of that force and $\Delta t$ the interval between the entry of successive pairs, then
$$\varepsilon_\gamma=\frac{T’}{\Delta t}$$
Reading the zero crossings from a seven-tooth model at 900 N·m gives $T’=0.58$ s and $\Delta t=0.2$ s, hence $\varepsilon_\gamma=2.9$. Repeating the procedure at 100 N·m and 500 N·m gives 2.3 and 2.6 (Table 3). The trend is monotonic: greater torque produces greater elastic deformation, the deformation bridges the clearance to the next pair, the contact range widens, and the actual contact ratio grows with load.
| Torque (N·m) | Contact duration $T’$ (s) | Interval $\Delta t$ (s) | Actual contact ratio |
|---|---|---|---|
| 100 | — | — | 2.3 |
| 500 | — | — | 2.6 |
| 900 | 0.58 | 0.20 | 2.9 |
Transmission error follows the same logic in reverse. With a constant nominal ratio, the theoretical output angle after the pinion turns through $A_1$ is $A_1z_1/z_2$, while the realised angle $A_2$ differs because of the quasi-conjugate mismatch of the flanks, elastic deflection and manufacturing error:
$$\Delta A=A_2-\frac{A_1z_1}{z_2}$$
Plotting $\Delta A$ against $A_2$ for the three torque levels shows that the amplitude of the error curve shrinks as the load rises. Deformation compensates part of the geometric mismatch, so the curve flattens and the mesh becomes quieter; a sharply oscillating error curve, by contrast, is the signature of an unstable and noisy mesh. Since the error amplitude and the contact ratio are driven by the same elastic compliance, the two indicators move in opposite directions with load and should be read together.
Explicit Framework for the Dynamic Mesh
A static solution cannot capture the impact that follows each tooth engagement, so the dynamic stage uses the explicit solver. The central-difference scheme integrates the equilibrium
$$\mathbf{M}\ddot{\mathbf{u}}=\mathbf{P}-\mathbf{I}$$
at each increment, with $\mathbf{M}$ the nodal mass matrix, $\mathbf{P}$ the external force vector and $\mathbf{I}$ the internal force vector. No global stiffness matrix is assembled and no iteration is performed, so contact status changes cost nothing in convergence. The stable time increment is set by the highest natural frequency of the model rather than by the load duration, which is why the run is inexpensive despite the very small steps.
The dynamic model keeps all teeth, because the mass distribution now matters. Only the region that enters mesh is refined; the remainder uses a coarser mesh, and the two zones are joined with tie constraints so that the refined patch does not propagate its element size through the whole wheel. The rigid reference point is placed at the centre of mass rather than on an arbitrary axial location, so that the inertia of the wheel is represented correctly. The baseline case drives the pinion at 100 rad/s with a 0.001 s ramp, applies 500 N·m back-torque to the gear, and uses a mass-proportional Rayleigh coefficient of 700.
Damping, Inertia and Friction
Rayleigh damping is the only damping model available without experimental identification, and its matrix is a linear combination of the mass and stiffness matrices:
$$\mathbf{C}=\alpha_R\mathbf{M}+\beta_R\mathbf{K}$$
Mass-proportional damping suppresses low-frequency oscillation and stiffness-proportional damping suppresses high-frequency oscillation. Gear mesh transients fall in the low-frequency range, so $\alpha_R$ was the parameter swept, at 400, 700 and 1000, with everything else held constant (Table 4). In all three cases the driven wheel starts from a fluctuating speed and settles at 32.6 rad/s; only the transient differs. Increasing $\alpha_R$ from 400 to 1000 shortens the settling time from 15 ms to 6 ms and reduces the amplitude of the speed fluctuation, but leaves the steady speed untouched. The peak contact force rises slightly, from 242 to 249 kN, and the steady force rises from 24 to 52 kN.
| $\alpha_R$ | Settling time (s) | Peak contact force (kN) | Steady contact force (kN) |
|---|---|---|---|
| 400 | 0.015 | 242 | 24 |
| 700 | 0.009 | 246 | 38 |
| 1000 | 0.006 | 249 | 52 |
Inertial load is the second lever. Since $F=ma$, the mass of the driven wheel sets the inertial force that resists the angular acceleration imparted at engagement, and it was varied by scaling the density to give mass ratios of 1 : 2 : 4 (Table 5). All three models settle at the same 32.6 rad/s, but the transient lengthens and its amplitude grows with mass. The peak contact force rises from 246 kN to 427 kN and 713 kN, and the steady force from 38 kN to 71 kN and 136 kN. The steady values scale almost proportionally with mass, so the inertia of the wheel, not the friction or the damping, controls the force level once the mesh has settled.
| Mass ratio | Peak contact force (kN) | Steady contact force (kN) | Transient duration |
|---|---|---|---|
| 1 | 246 | 38 | baseline |
| 2 | 427 | 71 | longer |
| 4 | 713 | 136 | longest |
Friction enters through the Coulomb criterion on the contact plane, with a critical shear stress proportional to the contact pressure:
$$\tau_{\text{crit}}=\mu p$$
Three coefficients, 0.05, 0.1 and 0.15, were compared (Table 6). Raising $\mu$ lowers the peak force from 261 kN to 246 kN and 232 kN and shortens the time to reach a stable speed, while the steady force stays at 38 kN in all three runs. Friction therefore acts as an additional dissipative path during the impact phase: it wears the flank, but it also removes kinetic energy from the initial oscillation.
| $\mu$ | Peak contact force (kN) | Steady contact force (kN) | Transient duration |
|---|---|---|---|
| 0.05 | 261 | 38 | longest |
| 0.10 | 246 | 38 | intermediate |
| 0.15 | 232 | 38 | shortest |
Speed, Torque and Which One Dominates
Pinion speed was set to 40, 100 and 250 rad/s with the acceleration ramp fixed at 0.001 s (Table 7). The driven wheel settles at 13.0, 32.6 and 81.5 rad/s, values that reproduce the kinematic ratio of 46/15 = 3.067 to within half a percent and thus confirm that the spherical-involute geometry and the assembly are consistent. Settling time grows from 6 ms to 11 ms as speed rises, the peak contact force climbs from 128 kN to 508 kN, and the steady force from 18 kN to 89 kN. At the higher speeds the impact at engagement is stronger, the resulting speed fluctuation has a higher frequency, and the system needs longer to damp it out.
| Pinion speed (rad/s) | Driven steady speed (rad/s) | Settling time (s) | Peak contact force (kN) | Steady contact force (kN) |
|---|---|---|---|---|
| 40 | 13.0 | 0.006 | 128 | 18 |
| 100 | 32.6 | 0.008 | 246 | 38 |
| 250 | 81.5 | 0.011 | 508 | 89 |
Combining the three speeds with three torque levels gives the nine-model matrix of Table 8, in which the same nominal torque increments of 100 → 500 → 900 N·m are applied at each speed. At 40 rad/s the peak force rises from 119.3 kN to 128.0 kN and 135.7 kN, increments of 7.30% and 6.02%. At 100 rad/s the corresponding increments fall to 2.03% and 1.14%, and at 250 rad/s to 0.33% and 0.25%. The crossover is the practically important result: in the low-speed regime the transmitted torque governs the dynamic mesh, whereas in the high-speed regime inertia governs and torque becomes a second-order influence.
| Pinion speed | 100 N·m | 500 N·m | 900 N·m | Δ (100→500) | Δ (500→900) |
|---|---|---|---|---|---|
| 40 rad/s | 119.3 | 128.0 | 135.7 | +7.30% | +6.02% |
| 100 rad/s | 241.1 | 246.0 | 248.8 | +2.03% | +1.14% |
| 250 rad/s | 506.4 | 508.1 | 509.4 | +0.33% | +0.25% |
The same matrix also shows how the influence of load washes out with speed: at 40 rad/s the three speed histories differ visibly from each other, while at 250 rad/s they nearly coincide. Any dynamic model of a spiral bevel pair therefore has to be calibrated against the operating regime it is meant to represent rather than against a single load case.
Modal Behaviour and Resonance Margins
Modal analysis solves the undamped free-vibration problem obtained by dropping the excitation and the damping from the equilibrium equation,
$$[\mathbf{M}]\{\ddot{\mathbf{X}}\}+[\mathbf{K}]\{\mathbf{X}\}=\{0\}\qquad\Longrightarrow\qquad\left([\mathbf{K}]-\omega^2[\mathbf{M}]\right)\{\mathbf{X}\}=\{0\}$$
Full-tooth models were used, with a free tetrahedral mesh (C3D4) and the bore surface fully constrained, since splitting the wheel into sectors would perturb exactly the global modes that are of interest. The Lanczos solver extracted the first six eigenvalues for each wheel.
| Order | Pinion $f$ (Hz) | Pinion mode shape | Gear $f$ (Hz) | Gear mode shape |
|---|---|---|---|---|
| 1 | 27,256 | circumferential | 12,262 | umbrella |
| 2 | 29,566 | torsional | 12,309 | torsional |
| 3 | 29,576 | torsional | 12,311 | torsional |
| 4 | 31,758 | second-order folding | 12,464 | second-order folding |
| 5 | 31,768 | second-order folding | 12,467 | second-order folding |
| 6 | 32,200 | umbrella + circumferential | 12,262 | third-order folding |
The frequencies increase monotonically with order except for the sixth gear eigenvalue, which repeats the first. Modes 2–3 and 4–5 form near-degenerate pairs separated by about 10 Hz, the standard signature of a symmetric structure whose repeated roots are split only by small numerical asymmetries. Both wheels exhibit the same families of shape: circumferential (in-plane) motion, torsional motion, umbrella (axial) motion and folding modes in which the rim alternately bends toward and away from the axis. The pinion frequencies are roughly 2.2 to 2.6 times those of the gear because the smaller wheel is stiffer relative to its mass. Participation factors extracted from the results file confirm the identification, with the first pinion mode dominated by rotation about the shaft axis and the second and third by rotation about the transverse axes.
Folding modes deserve particular attention. They deform the rim and the web rather than the tooth itself, so they both reduce the effective support of the loaded flank and shorten fatigue life; they can be shifted upward by stiffening the web or by moving the rim support, and the spiral angle and pressure angle offer a secondary tuning lever because both change the mass distribution and the tooth stiffness simultaneously. The computed separation between the tooth-mesh orders and the first natural frequency is large: at 40 to 250 rad/s the shaft turns at 6.4 to 39.8 Hz, so the 15th-order mesh frequency spans 95 to 597 Hz, more than an order of magnitude below the 12.26 kHz of the gear and the 27.26 kHz of the pinion. Within the speed range examined, tooth-mesh excitation therefore cannot drive either wheel into resonance, and the design effort is better spent on the folding modes and on the transient impact at engagement than on mesh-order coincidence.
Design Implications
Taken together, the results describe a design chain in which each stage constrains the next. The spherical involute plus cutter kinematics define a flank that can be rebuilt automatically from a small parameter set, which is what makes the geometric variants needed for optimisation affordable. The hexahedral sector model with a staged two-step load application gives stress fields that can be checked against allowable contact and bending limits at rated torque, and it also yields the two quantities that a stress analysis alone does not: the load-dependent contact ratio, which rises from 2.3 to 2.9 between 100 and 900 N·m, and the transmission error, whose amplitude falls over the same range.
The dynamic sweeps add three practical rules. First, mass-proportional damping shortens the engagement transient without altering the steady speed, so it is the natural parameter for suppressing start-up shock; raising it from 400 to 1000 cut the settling time from 15 ms to 6 ms. Second, the mass of the driven wheel sets the steady contact force almost proportionally, which means that lightweighting a gearbox cannot be evaluated on strength grounds alone. Third, the friction coefficient trades peak force against wear: raising $\mu$ from 0.05 to 0.15 reduced the peak force by about 11% while leaving the steady force unchanged, so surface treatment is a viable route to quieter engagement provided the wear penalty is accepted.
The most consequential finding is the shift in the governing variable with speed. At 40 rad/s a fourfold increase in torque changes the peak contact force by more than 13%, while at 250 rad/s the same change alters it by less than 0.6%. Design studies that extrapolate low-speed torque sensitivity to high-speed operation will therefore misallocate margin, and high-speed units should be assessed on inertia and on the engagement impact rather than on static load capacity alone. The numerical predictions reported here have not been checked against strain-gauge or transmission-error measurements on a physical pair, which remains the necessary next step before the trends are used as quantitative design rules.