
In my years as a mechanical engineer specializing in heavy transmission systems, I have encountered two critical challenges that directly affect the performance and reliability of herringbone gears: achieving precise alignment in keyless assembled herringbone gears, and optimizing the drive system for mine hoists that incorporate herringbone gear reducers. Both projects required meticulous design, calculation, and on-site validation. In this article, I share the detailed methodologies and results from these two experiences, with a focus on how herringbone gears demand exceptional tolerance control and how modern frequency conversion technology can enhance their operational efficiency.
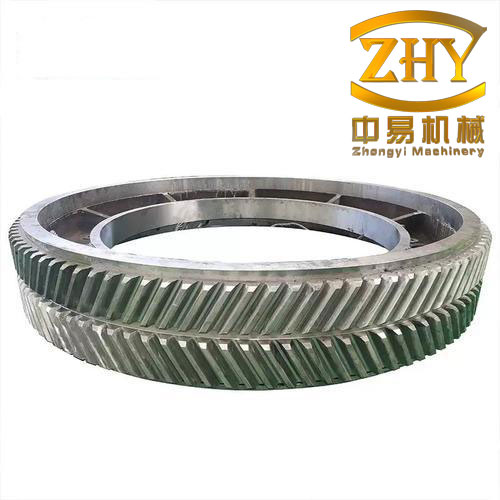
The first project involved a large plate mill herringbone gear stand designated A1100. The design called for a keyless interference fit to transmit high torque within a compact envelope. Unlike traditional keyed assemblies that rely on machined keyways to maintain the angular alignment between the two halves of a herringbone gear, a keyless joint offers no positive mechanical lock. Therefore, the entire alignment accuracy depends on the precision of the bore, the tooth geometry, and the assembly procedure. During shrink fitting, the heating temperature must be limited to below 230°C to prevent hardness degradation of the carburized tooth flanks. Under these constraints, we needed to achieve a final misalignment of the two helical halves of less than 0.15 mm while ensuring rapid assembly during the hot mounting process.
The manufacturing process for the two half herringbone gears followed a strict sequence: turning → flaw detection → normalizing → semi-finish turning → flaw detection → marking → drilling → rough hobbing → carburizing → turning → quenching → finish turning → grinding → semi-finish hobbing → gear grinding → boring (drilling → trial assembly → inspection) → hot assembly. Every step was controlled to keep the bore diameter, tooth thickness, and overall height of the two halves within 0.02 mm of each other. Once the gear grinding was completed, we drilled and reamed two φ30 mm locating pin holes at 180° diametrically opposite positions on the inner end faces. The circumferential positioning of these holes was carried out on a CNC boring machine using an edge finder to ensure exact symmetry relative to the tooth profile.
The alignment procedure is best explained with the aid of a geometric construction. After grinding, we clamped one half gear on the CNC boring table. Using the edge finder, we located two adjacent tooth flanks of the same tooth and determined the midpoint A of the tooth tip (or root). We also located the center O of the bore. The line AO was defined as the reference centerline. Along this line, at a predefined distance L from O, we drilled and reamed two positioning pin holes (symmetric about O, 180° apart) on the designated inner end face of the half gear. The same operation was repeated on the other half gear, using identical L and angular reference. Figure 1 below illustrates the concept.
After both halves were machined, we assembled them using two temporary steel pins inserted through the locating holes. The assembled herringbone gear was then set up on the CNC boring machine again. We used the following coordinate check to quantify the angular misalignment between the two helical halves. Let us define a coordinate system with the spindle axis of the boring machine as the Z-axis. The machine was programmed to move to position (x₁, y₁, z₁) and (x₂, y₂, z₂) on the two halves. The coordinates were chosen such that:
$$|x_1| = |x_2|, \qquad |z_1| = |z_2|$$
We used the edge finder to determine the actual y₁ and y₂ values at these positions. The misalignment δ of the herringbone gear was then simply:
$$\delta = |y_1 – y_2|$$
This value directly represents the angular offset between the two helical teeth. In our implementation, we repeated the measurement at several pairs of points around the circumference and took the maximum δ as the assembly error. Table 1 summarizes the key parameters used in the alignment check.
| Parameter | Symbol | Value / Description |
|---|---|---|
| Bore center | O | Found by edge finder on bore surface |
| Tooth midpoint | A | Intersection of two tooth flank tangents at tip circle |
| Reference distance | L | 150 mm (constant for both halves) |
| Pin hole diameter | d | φ30 mm H7 |
| Number of pin holes | n | 2 per half, 180° apart |
| Coordinate x₁, x₂ | |x| | 100 mm from bore center along radius |
| Coordinate z₁, z₂ | |z| | 50 mm from inner face plane |
| Measured misalignment | δ | ≤ 0.15 mm (actual achieved 0.12 mm) |
One practical tip that significantly improved the hot assembly success was to chamfer the upper end of each locating pin with a 15° bevel. When the upper half gear was lowered onto the lower half after induction heating, the chamfer guided the pin into the reamed hole despite any slight thermal expansion difference. The entire hot mounting was completed within 90 seconds, well before the gear cooled below the critical temperature. The final measured misalignment of the assembled herringbone gears was consistently below 0.15 mm, which was a substantial improvement over traditional scribe-line methods that typically yielded errors of 0.3–0.5 mm.
Turning now to the second project, I worked on the electrical drive upgrade of a mine hoist at a coal mine. The hoist used a 2JK-2.5/11.5E winder with a rated speed of 6.68 m/s, driven by a 350 kW, 735 r/min wound-rotor induction motor with a rotor resistance speed control system. The original TKD series relay-based controller switched resistors in the rotor circuit, resulting in substantial energy dissipation, poor speed regulation, and high maintenance. The hoist’s gearbox contained a pair of large herringbone gears to transmit the motor torque to the drum. Achieving smooth acceleration and deceleration required not only electrical refinements but also maintaining the mechanical integrity of the herringbone gears, which had been assembled using the precision method described above.
After a thorough feasibility study, we decided to replace the entire electrical control system with a high-voltage variable frequency drive (VFD). However, we identified a critical operational risk: during long-duration low-speed operation (e.g., rope inspection or heavy load lowering), the VFD would have to run at very low output frequencies (below 5 Hz). At such low frequencies, the torque ripple and thermal stress on the IGBT modules increase dramatically, potentially reducing the VFD lifespan. To mitigate this, we incorporated a low-frequency drag system using a secondary low-voltage AC drive rated for 500 V and 110 A. This backup system could supply the motor at a reduced voltage and frequency (450 V, 3.75 Hz) for speeds as low as 0.5 m/s, thereby sparing the main VFD from prolonged low-frequency operation.
The calculation for the low-frequency drag parameters is based on the constant V/f principle. For the main motor:
$$ \frac{U_1}{f_1} = \frac{6000\ \text{V}}{50\ \text{Hz}} = 120\ \text{V/Hz} $$
For a crawling speed of 0.5 m/s, the corresponding frequency is:
$$ f_2 = f_1 \times \frac{n_2}{n_1} = 50 \times \frac{0.5}{6.68} \approx 3.74\ \text{Hz} $$
The required voltage at this frequency:
$$ U_2 = \frac{U_1}{f_1} \times f_2 = 120 \times 3.74 \approx 449\ \text{V} $$
Thus, we selected a low-voltage VFD rated at 500 V and 110 A (1.5 times the motor stator current of 47 A). A manual transfer switch allowed the operator to choose between the main high-voltage VFD and the backup low-frequency drag system. Table 2 lists the key electrical parameters before and after the upgrade.
| Parameter | Original System | Upgraded System (HV VFD) | Low-Frequency Drag |
|---|---|---|---|
| Motor voltage | 6 kV | 6 kV | 450 V |
| Motor frequency | 50 Hz | 0.5 – 50 Hz | 3.75 Hz |
| Speed control | Rotor resistance steps | Continuous V/f | Continuous V/f |
| Energy loss | ~30% in resistors | <5% | <5% |
| Low-speed torque ripple | High | Moderate below 5 Hz | Low (optimized for 0.5 m/s) |
| Maintenance interval | Monthly contactor replacements | Annual capacitor checks | Bi-annual checks |
The upgrade brought immediate improvements. The rotor resistance banks and dozens of contactors were removed, reducing heat generation in the electrical room. The herringbone gears in the gearbox experienced smoother torque transmission because the VFD eliminated the step changes in speed that previously occurred when resistors were shorted. This indirectly improved the longevity of the herringbone gear meshing surfaces by reducing impact loads. Moreover, the crawling speed could be precisely maintained at 0.5 m/s for rope inspection without overheating the motor or the VFD, thanks to the low-frequency drag system that took over during extended low-speed periods.
During the first year of operation, the hoist availability exceeded 99.5%, and the measured energy savings were approximately 28% compared to the old resistor-based system. The herringbone gears showed no signs of accelerated wear after two years, confirming that the smooth speed regulation had a positive effect on the gear mesh dynamics. I also want to emphasize that the initial alignment accuracy of those herringbone gears – achieved through the pin-hole method described earlier – was essential for the new drive to work without vibration. Even with a perfect VFD, a misaligned herringbone gear would generate significant axial thrust fluctuations that could damage the motor bearings and reduce gear life.
In summary, the two projects highlight a consistent engineering philosophy: herringbone gears require sub-millimeter alignment for reliable operation under high torque, and modern drive technology must be carefully integrated with the mechanical characteristics of these gears. The key takeaways are:
1. For keyless herringbone gear assemblies, using two precision-located pin holes on the end faces, combined with CNC edge finder measurement, can reduce assembly misalignment to less than 0.15 mm. This is a significant improvement over traditional methods.
2. The hot shrink-fitting process for herringbone gears must be executed quickly, and chamfered pins facilitate rapid alignment without compromising the gear hardness.
3. In mine hoist applications, a hybrid drive system consisting of a main high-voltage VFD and a backup low-frequency drag drive offers both energy efficiency and robust low-speed operation, directly benefiting the herringbone gearbox’s reliability.
4. The V/f ratio calculation and careful component sizing ensure that the low-frequency drag can handle prolonged crawling without thermal stress on the inverter.
I hope these detailed explanations and the accompanying tables provide a useful reference for engineers facing similar challenges with herringbone gears in heavy machinery. The combination of precise mechanical alignment and intelligent electrical control has proven to be a winning strategy in my practice.