
In my research and production practice, the grinding of a spiral bevel gear is not merely a finishing operation. It is a controlled process that connects heat treatment, machine kinematics, wheel topography, cooling, and contact pattern correction. I have found that a spiral bevel gear can be ground to grade 5–6 accuracy, with surface roughness Ra = 0.4–1.6 μm and noise below 75 dB, when the process window is established correctly. My approach begins with the machine, then the wheel, then the parameters, and finally the compensation and burn-control loop. The spiral bevel gear is widely used in aerospace, automotive, machine tool, and heavy equipment applications, and each application demands stable transmission, high load capacity, low noise, long life, and high speed performance. Grinding reduces cutting errors, removes heat-treatment distortion, and produces a more accurate tooth surface. I therefore treat the spiral bevel gear grinding process as an integrated system rather than a single machining step.
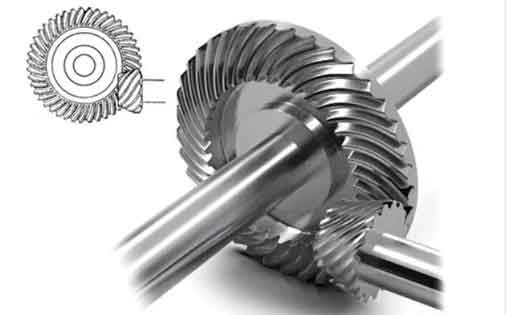
I base my work on a Phoenix 800G CNC hypoid grinder. The machine follows the kinematic logic of mechanical spiral bevel gear generators, but all gear trains and adjustment mechanisms are removed. The relative motion of the tool and workpiece is controlled directly by the CNC axes. In my setup, three linear axes and three rotary axes define the forming motion. The linear axes are X, Y, and Z. The rotary axes are A, B, and C. The X and Y axes are horizontal and vertical axes perpendicular to the tool spindle. The Z axis is parallel to the tool spindle. The A axis is the workpiece spindle. The B axis is the workpiece box swivel axis and is parallel to the Y axis. The C axis is the tool spindle rotary axis. By coordinating X and Y, I can simulate the cradle rolling motion. By changing the B axis angle, I can simulate the cutter tilt mechanism. By changing the rolling ratio between the generating gear and the workpiece, I can simulate the modified roll mechanism. For grinding, a D axis is added for the wheel dresser. In my experience, this axis arrangement gives me the freedom to reproduce a spiral bevel gear tooth surface without the cumulative errors of a mechanical linkage.
The Phoenix II design uses an integral column structure. The workpiece box and tool box are mounted on two sides of the column at 90° to each other. Compared with the Phoenix I arrangement, the tool and workpiece positions are exchanged, and the tool spindle swings around the B axis instead of using a workpiece spindle box rotary table. This reduces the overhang of the tool and workpiece, increases static and thermal rigidity, and reduces floor space by more than 30%. Although the structure is different, the basic principle remains the same: the relative position and motion between the wheel and the workpiece must be maintained throughout the spiral bevel gear grinding cycle. I convert the relative position and motion at each instant into machine axis commands by vector transformation, and the CNC interpolates the discrete points. After all cutting intervals are completed, the envelope of the wheel cutting edge remains on the workpiece, and that envelope is the generated spiral bevel gear tooth surface. The code generation software embedded in the Phoenix control allows me to enter the basic machine setting parameters from the gear calculation program, and the machine automatically generates the NC code. This is important for me because it links the theoretical spiral bevel gear geometry directly to the actual grinding motion.
The main specifications of the Phoenix 800G that I use are summarized in Table 1. These limits define the feasible process window for a spiral bevel gear, especially when the gear is large or when the ratio is extreme.
| Machine item | Specification |
|---|---|
| Limit transmission ratio | 10:1 |
| Full tooth depth | 31.75 mm |
| Maximum tooth width | 116.84 mm |
| Number of teeth range | 5–200 teeth, including 5 and 200 |
| Wheel diameter | 152.4–508 mm |
| Maximum large gear pitch diameter for cutter disk i = 1:1 | 549.40 mm |
| Maximum large gear pitch diameter for cutter disk i = 2:1 | 694.94 mm |
| Maximum large gear pitch diameter for cutter disk i = 5:1 | 762.00 mm |
| Total machine power | 67 kW |
For a spiral bevel gear produced by the generating method, both the pinion and the gear can be ground with a straight cup wheel. The cup wheel has the required cross-section. It rotates around the wheel spindle axis, and its grinding surface represents the generating tooth surface of the virtual generating gear. I use this method for spiral bevel gear teeth with a pitch cone angle below 70°. In high-volume automotive rear axle production, however, the gear member of a spiral bevel gear pair is often cut by the forming method when the ratio is i ≥ 2.5. If I grind a forming-method gear directly with a straight cup wheel, the wheel cutting surface contacts the full tooth surface along the tooth length. This creates a large grinding force and prevents coolant from entering the grinding zone. The result is tooth surface burn. To solve this, I use the Waguri eccentric mechanism method.
In the Waguri method, the grinding spindle is mounted inside an eccentric spindle with an eccentricity of about 0.1 mm. When the grinding spindle rotates around the eccentric spindle, the wheel alternately grinds the convex and concave flanks in the tooth slot. The wheel and the tooth slot flanks create an intermittent grinding gap. The eccentricity provides additional clearance for coolant and chips. Coolant can enter the ground tooth surface, cool the surface, lubricate the wheel, and dissipate the heat generated during grinding. This prevents burn on the spiral bevel gear tooth surface and allows the maximum feed and metal removal rate. With the Waguri method, I can use a straight cup wheel directly instead of a more expensive spread cup wheel, but the machine must have an additional rotating mechanism. For forming-method gears, after I set the relative position between the wheel and the workpiece, no axis interpolation is needed for the grinding cycle. The carriage moves to the start feed position, feeds to full depth in three stages, dwells briefly, and then retracts and indexes to the next tooth. This is a very efficient way to grind a spiral bevel gear in large quantities.
The wheel is one of the most important variables in my spiral bevel gear grinding process. I can use CBN wheels or Norton SG wheels, and the SG wheel is the most common in my experience. An SG wheel is a microcrystalline ceramic alumina wheel produced by powder metallurgy. It is harder and tougher than a conventional alumina wheel, and its cutting speed can reach 1,700 m/min. The SG wheel body is bonded to a steel hub to increase overall stiffness and improve grinding performance. The production efficiency of an SG wheel is very high. Usually one cycle or a small number of cycles is enough to finish the spiral bevel gear. Although the price is higher than a conventional alumina wheel, the cost per gear is very low. The wheel cross-section directly determines the ground tooth profile and therefore the contact condition and transmission characteristics of the spiral bevel gear. I combine machine adjustment and wheel dressing to control the actual tooth surface contact and obtain a reasonable theoretical tooth surface and contact area.
The straight cup wheel cross-section parameters that I use are listed in Table 2. These parameters correspond to the machine adjustment card items and determine the spiral bevel gear tooth form after grinding.
| Item | Parameter | Description | Typical range |
|---|---|---|---|
| D01 | Spread blade / ob / ib | Double-sided, outside single-sided, inside single-sided cutter selection | — |
| D02 | Wheel diameter | Nominal diameter for double-sided cutter; tip diameter for single-sided cutter | 35–360 mm |
| D03 | Point width | Cutter point width; for double-sided cutter it is the cutter offset; for single-sided cutter it is the tip width | 0.25–8 mm |
| D04 | Outside pressure angle | Outside cutter pressure angle | 3°–50° |
| D05 | Inside pressure angle | Inside cutter pressure angle | 3°–50° |
| D06 | Outside profile radius of curvature | Wheel outside cutter curvature radius; straight if 0 | −9999 to 9999 mm |
| D07 | Inside profile radius of curvature | Wheel inside cutter curvature radius | −9999 to 9999 mm |
| D08 | Outside edge radius | Outside cutting edge tip fillet radius | 0–8 mm |
| D09 | Inside edge radius | Inside cutting edge tip fillet radius | 0–8 mm |
| D10 | Top angle | Angle between actual wheel top edge and theoretical top surface | 0–45° |
| D11 | Grinding depth | Distance from wheel top surface to dressed end along wheel axis | 3–27 mm |
| D12 | Wheel tip advance | Distance between actual wheel top edge and theoretical top surface | −3 to 3 mm |
| D13 | Chamfer angle | Wheel root chamfer | Usually 20° |
| D18 | Outside toprem depth | Outside cutter toprem depth to avoid interference | 0–10 mm |
| D19 | Outside toprem radius | Fillet radius between toprem and cutting edge | 0–9999 mm |
| D20 | Inside toprem depth | Inside cutter toprem depth | — |
| D21 | Inside toprem radius | Inside cutter toprem radius | — |
| D22 | Outside flankrem depth | Outside cutter flankrem depth along tooth height | 0–10 mm |
| D23 | Outside flankrem radius | Fillet radius between flankrem and cutting edge | 0–9999 mm |
| D24 | Inside flankrem depth | Inside cutter flankrem depth | — |
| D25 | Inside flankrem radius | Inside cutter flankrem radius | — |
| 18 | Wheel height | Wheel height after replacement or adjustment card change | 100–254 mm |
I pay particular attention to D06 and D07 because the profile radius of curvature is a direct way to modify the spiral bevel gear tooth surface curvature. If I input a positive value, the dressed wheel edge becomes concave and the tooth surface becomes convex. If I input a negative value, the edge becomes convex and the tooth surface becomes concave. This is a powerful tool for contact pattern correction. I also use D18 to D25 to create toprem and flankrem, which prevent interference between the pinion root and the gear tip and allow the contact area to be released at the tooth top. For a spiral bevel gear, these details determine whether the contact pattern is concentrated in a dangerous edge zone or is distributed safely across the tooth surface.
The grinding parameters are set through the machine adjustment items. The wheel direction is chosen according to the hand of the spiral bevel gear. A clockwise wheel direction is used for a left-hand gear, and a counterclockwise wheel direction is used for a right-hand gear. The wheel surface speed is usually 15–25 m/s for medium-modulus spiral bevel gear grinding. At this speed, I obtain high efficiency and a small surface roughness value. The wheel surface speed is calculated by
$$ v_s = \frac{\pi D_s n_s}{60} $$
where vs is the wheel surface speed in m/s, Ds is the wheel diameter in m, and ns is the wheel speed in r/min. The rolling direction is usually from the toe to the heel. The start roll rate is the grinding feed angular velocity. I typically use 5–8 °/s. The roughing metal removal rate is recommended at 10–12 mm²/s, and the finishing metal removal rate is recommended at 4–5 mm²/s. For a spiral bevel gear with a larger module, the workpiece is less likely to deform and vibrate, so I can use a larger grinding allowance.
| Parameter | Machine item | Typical value | Purpose |
|---|---|---|---|
| Wheel direction | 15 | CW for left-hand, CCW for right-hand | Match spiral bevel gear hand |
| Wheel surface speed | 20 | 15–25 m/s | Efficiency and roughness |
| Roll direction | 50 | Toe to heel | Control contact development |
| Start roll rate | 60 | 5–8 °/s | Grinding feed angular velocity |
| Rough metal removal rate | Rgh metal rem. rate | 10–12 mm²/s | Roughing productivity |
| Finish metal removal rate | Fin metal rem. rate | 4–5 mm²/s | Finishing quality |
The metal removal rate in my process is approximated by
$$ Q = a_p a_e v_w $$
where Q is the material removal rate in mm³/s, ap is the depth of cut in mm, ae is the effective contact width in mm, and vw is the workpiece feed speed in mm/s. For a spiral bevel gear, the contact width changes continuously along the tooth trace, so I use an average effective width when I set the removal rate. The heat generated in the grinding zone is roughly proportional to Q. Therefore, when I increase the removal rate, I must increase cooling and reduce the risk of burn. I have found that the best spiral bevel gear quality comes from a moderate removal rate and a stable wheel topography, not from the highest possible removal rate.
For forming-method grinding with the Waguri mechanism, the machine does not need continuous axis interpolation after the relative position is set. The carriage moves to the start feed position, feeds to full depth in three stages, dwells, and then retracts and indexes. The feed parameters I use are listed in Table 3.
| Item | Parameter | Typical value |
|---|---|---|
| PL05 | First feed position | 0.7–1.0 mm |
| PL06 | Second feed position | 0.5–0.8 mm |
| PL07 | First plunge feed rate | 180–200 mm/min |
| PL08 | Second plunge feed rate | 20–35 mm/min |
| PL09 | End plunge feed rate | 8–12 mm/min |
| PL10 | Feed dwell time | 0.18–0.20 s |
The stock distribution is another critical factor for a spiral bevel gear. When I use the double-sided method, both flanks of the tooth are ground simultaneously, and the tooth thickness depends on the wheel thickness and the depth to which the workpiece advances into the wheel. When I use the single-sided method, the two flanks are ground separately. I determine the stock distribution by using a spherical solid stock divider that contacts the rotating gear. This allows me to equalize the stock on both flanks. For the double-sided method, the stock per flank is usually 0.075–0.10 mm. For the single-sided method, the stock is usually 0.05–0.20 mm. A smaller stock reduces the risk of burn and improves accuracy and surface roughness. In my experience, a spiral bevel gear with uniform stock distribution has a much more stable contact pattern after grinding.
The wheel dressing system on the Phoenix 800G uses a CNC dresser mounted on the workpiece spindle table. A diamond roll dresses the SG wheel. I can dress the wheel into various shapes according to the tooth surface modification requirements. The diamond roll diameter is usually about 40% of the wheel diameter and is selected according to standard specifications. For finish dressing, I use a dressing feed increment of 0.05–0.1 mm per pass and a dressing traverse speed of 0.1–0.2 mm per wheel revolution. For rough dressing, I use a dressing feed increment of 0.5 mm and a dressing traverse speed of 0.05 mm per wheel revolution.
The dresser-to-wheel surface speed ratio is set by item D46. This value is the ratio of the roll surface speed to the wheel surface speed. A positive value means the wheel and roll rotate in opposite directions, and the contact point linear velocities are in the same direction. This gives a small dressing force, a sharp wheel, and good workpiece surface roughness. A negative value means the wheel and roll rotate in the same direction, and the contact point linear velocities are opposite. This gives a large dressing force and a dull wheel edge. The roll speed is usually 1.5 times the wheel speed. I follow the recommendation that finish dressing uses a positive value in the range 0.6–0.8, and rough dressing uses a negative value in the range −0.7 to −0.6. Before dressing, I pre-form the wheel by turning to reduce diamond roll consumption. Then I rough-dress with a coarse diamond roll and finish-dress with a fine roll. I also intentionally increase the pressure angle of the non-working wheel surface to reduce dressing time, reduce the dressing amount, and extend wheel life.
| Dressing item | Finish dressing | Rough dressing |
|---|---|---|
| Feed increment per pass | 0.05–0.1 mm | 0.5 mm |
| Traverse speed per wheel revolution | 0.1–0.2 mm | 0.05 mm |
| Dresser-to-wheel speed ratio | 0.6–0.8 positive | −0.7 to −0.6 negative |
| Wheel condition | Sharp, low force | Dull, high force |
| Typical application | Final spiral bevel gear profile | Pre-shaping and stock removal |
Wheel wear compensation is essential for a spiral bevel gear because the wheel loses material and the tooth thickness changes during the grinding cycle. The first tooth is usually ground when the wheel is sharpest, so it wears the least. The last tooth is ground when the wheel is more worn, so it wears more. This creates a pitch error between the first and last teeth. In a rolling inspection, I can see that the contact pattern length of the first tooth differs from that of the last tooth. The effect is most obvious in forming-method grinding of the gear member. To solve this, I first measure the pitch error Δt between the last tooth and the first tooth on a gear measuring center. Then I calculate the compensation amount in the tooth depth direction by
$$ \Delta h = \frac{\Delta t}{\sin\alpha} $$
where Δh is the axial wear compensation, Δt is the measured pitch error, and α is the normal pressure angle. I enter Δh into item D70. I set item D71, the number of teeth for fast wear, to 1, and item D72, the percentage of total fast wear, to 1/Z, where Z is the number of teeth. The compensation principle is that as the wheel wears, I compensate in the tooth height direction by moving deeper or shallower by
$$ \Delta h_{\text{per tooth}} = \frac{\Delta h}{Z-1} $$
relative to the theoretical full tooth depth. This distributes the wear effect across the tooth index positions. If the pinion has many teeth, for example 17 teeth, the same wear problem can occur, and I can use workpiece rotational compensation. In that case, I measure Δt and enter it into item D75, the wheel wear correction in the workpiece rotation direction. I set D76 to 1 and D77 to 1/Z. The compensation principle is that as the wheel wears, I compensate in the indexing direction by rotating more or less by
$$ \Delta \theta_{\text{per tooth}} = \frac{\Delta t}{Z-1} $$
relative to the theoretical pitch. When I use double-sided grinding for the gear, the two flanks may not wear equally, so I can also apply D75–D77 to compensate in the workpiece rotation direction. This is a very practical way to keep the spiral bevel gear tooth thickness and pitch within tolerance.
| Compensation item | Parameter | Formula or value | Purpose |
|---|---|---|---|
| D70 | Wheel wear correction—axial | Δh = Δt / sin α | Compensate tooth depth |
| D71 | Number of teeth for fast wear | 1 | First tooth wears fastest |
| D72 | Percent total fast wear | 1 / Z | Distribute fast wear fraction |
| D75 | Wheel wear correction—work rotation | Δt | Compensate indexing error |
| D76 | Number of teeth for fast wear | 1 | First tooth wears fastest |
| D77 | Percent total fast wear | 1 / Z | Distribute fast wear fraction |
Grinding burn and cracks are the most serious quality risks in a spiral bevel gear. The wheel speed is high, the contact area is small, and the heat generated in the contact zone can produce a very high temperature. If cooling is insufficient, the surface metallographic structure undergoes tempering, an oxidation color appears, and grinding burn occurs. The mechanical stress from abrasive extrusion and plastic deformation, the phase transformation stress and thermal stress from grinding heat, and the residual stress from heat treatment combine to form the residual stress on the ground surface. When the tensile stress exceeds the tensile strength of the gear material, a grinding crack forms. The burned layer has a lower hardness than the hardened matrix, which leads to early wear of the tooth surface. Some cracks appear immediately after grinding, and some appear after a period of operation. I have observed two common crack patterns in a spiral bevel gear. The first is a short line crack extending from the tooth top toward the tooth root, distributed alternately on the tooth surface, with a depth of about 0.05–0.30 mm. This type of crack can lead to bending fatigue fracture at the tooth root. The second is a fish-scale network crack with a depth of about 0.20–0.50 mm. This type of crack can lead to tooth surface spalling. The factors that influence burn include material, wheel, grinding parameters, and cooling.
The heat flux in the grinding zone can be approximated by
$$ q = \frac{P}{A} = \mu p v_s $$
where q is the heat flux, P is the grinding power, A is the contact area, μ is the friction coefficient, p is the contact pressure, and vs is the wheel surface speed. The contact temperature rise can be estimated by a moving heat source model:
$$ T = T_0 + \frac{2q\sqrt{\alpha t}}{\sqrt{\pi}k} $$
where T is the surface temperature, T0 is the ambient temperature, α is the thermal diffusivity, t is the contact time, and k is the thermal conductivity. This equation shows why I must control both the heat flux and the contact time. If I reduce the depth of cut, reduce the feed rate, or improve cooling, I reduce the surface temperature and the burn risk. For a spiral bevel gear, the tooth root is the most critical region because the slot is narrow and coolant access is difficult.
| Burn or crack factor | Mechanism | Prevention method |
|---|---|---|
| Retained austenite | Transforms under grinding heat | Keep below 30%; needle size below 0.02 mm |
| Surface carbon concentration | Too high causes carbides and retained austenite | Control 0.75%–0.95% |
| Carbide distribution | Network or block carbides cause local overheating | Uniform spherical or granular carbides |
| Surface oxidation or decarburization | Soft layer overloads wheel | Protect atmosphere during heat treatment |
| Quenching speed | Too fast causes fish-scale cracks | Reduce quenching speed while maintaining hardness |
| Tempering | Insufficient tempering leaves residual stress | Higher temperature and longer time |
| Grinding depth | Too large generates too much heat | Reduce depth, improve stock distribution, multiple passes |
| Cooling | Coolant cannot enter narrow root | Adjust nozzle at 30°–40° close to wheel |
Heat treatment has a strong influence on the grindability of a spiral bevel gear. I control the retained austenite content to less than 30% and the austenite needle size to less than 0.02 mm. The surface carbon concentration should be 0.75%–0.95%. If the carbon concentration is too high, network carbides or excessive free carbides form, the structure becomes extremely hard, and local overheating and surface tempering can occur. High surface carbon also produces excessive retained austenite, which increases the risk of burn and cracks. Carbide distribution should be uniform, and the morphology should be spherical, granular, or small block. Network carbides and large block carbides are not allowed. Improper protection during heat treatment can cause surface oxidation and a thin decarburized layer. The decarburized layer is soft and can overload or overheat the wheel, causing surface tempering. While maintaining hardness, I reduce the quenching speed appropriately because too fast a quench can produce fish-scale cracks. I also use a tempering temperature that is as high as possible and a tempering time that is as long as possible. This allows the quenched martensite to transform fully, improves the plasticity of the carburized and hardened surface, eliminates residual stress, and improves the surface stress distribution. All of these measures reduce the probability of grinding cracks in the spiral bevel gear.
Grinding parameters also affect burn. A large grinding depth generates excessive grinding heat and leads to damage. To minimize the grinding depth, I reduce heat-treatment distortion, align the gear accurately after quenching so that the stock is uniformly distributed, and use multiple grinding passes. The heat generated during grinding is roughly proportional to the metal removal rate per unit time. In forming-method grinding, the entire wheel profile participates at the same time, and the removed stock is relatively large. Therefore, when necessary, I reduce the depth of cut and lower the feed rate to avoid grinding damage. I have found that a spiral bevel gear with a well-controlled heat-treatment distortion and a uniform stock distribution can be ground with a much lower risk of burn even at a higher production rate.
Cooling is the most direct way to control grinding heat. The tooth slot root is narrow, and coolant does not easily enter. I adjust the coolant nozzle at an angle of 30°–40° close to the wheel so that the wheel carries the grinding fluid fully into the grinding zone. This removes as much cutting heat as possible and reduces thermal stress. I filter the coolant to remove chips and abrasive particles and keep the coolant clean. The coolant tank must be large enough to avoid excessive gas or foam and to prevent rapid temperature changes. In my setup, I use an Oberlin filtration system and a Hansen cooling system. The cooling oil is Mobil 446, with a flash point of 202 °C and a capacity of 2,270 L. The cooling system is not an accessory; it is a process component that directly determines whether the spiral bevel gear is burned or not.
The detection of grinding burn and cracks is mandatory in my process. I follow the chemical etching method for surface tempering inspection. I use nitric acid or hydrochloric acid solution to etch the gear and observe the color change on the tooth surface to determine the burn level. After grinding, I check for cracks by one of the following methods: magnetic particle inspection, fluorescent penetrant inspection, or dye penetrant inspection. For a spiral bevel gear used in a safety-critical application, I never release the part without a crack inspection. The cost of inspection is small compared with the cost of a failed gear.
| Inspection method | Principle | Application |
|---|---|---|
| Chemical etching | Nitric or hydrochloric acid corrosion | Surface tempering burn level |
| Magnetic particle inspection | Magnetic flux leakage | Surface and near-surface cracks |
| Fluorescent penetrant inspection | Fluorescent dye penetration | Fine surface cracks |
| Dye penetrant inspection | Visible dye penetration | General surface cracks |
Proportional correction is a powerful method for controlling the contact pattern of a spiral bevel gear. I keep the grinding process consistent with the cutting process so that the grinding stock is small and uniform. Manufacturers have accumulated a large amount of machine setting data for spiral bevel gear cutting, and converting those settings to the CNC grinder is a common production practice. The Gleason calculation card gives four or five groups of proportional relationships among machine adjustment corrections. I use these relationships to guide the operator in changing the contact area size, position, and direction based on the rolling inspection. The corrections essentially modify the spiral angle, pressure angle, profile curvature, and lengthwise curvature errors of the tooth surface.
The proportional correction parameters for one automotive rear axle spiral bevel gear produced by the HFT method are shown in Table 4. These values are examples from my process and are used to adjust the machine when the contact pattern must be moved or reshaped.
| Correction item | Machine item | Pinion concave side | Pinion convex side |
|---|---|---|---|
| Spiral angle correction at 254 mm from inner end | Radial cutter position correction | −0.095 mm | +0.102 mm |
| Spiral angle correction at 254 mm from inner end | Angular cutter position correction | +0.01° | −0.01° |
| Diagonal correction at 381 mm outer diagonal | Radial cutter position correction | −0.980 mm | +1.000 mm |
| Diagonal correction at 381 mm outer diagonal | Cutter rotation correction | +0.72° | −0.59° |
| Diagonal correction at 381 mm outer diagonal | Work position correction | −2.153 mm | +2.028 mm |
| Diagonal correction at 381 mm outer diagonal | Bed position correction | −0.132 mm | +0.175 mm |
| Diagonal correction at 381 mm outer diagonal | Roll ratio correction | −0.05000 | +0.05000 |
| Tooth height curvature correction at 2.54 mm contact area narrowing | Radial cutter position correction | −2.264 mm | +2.203 mm |
| Tooth height curvature correction at 2.54 mm contact area narrowing | Cutter rotation correction | −0.43° | +0.43° |
| Tooth height curvature correction at 2.54 mm contact area narrowing | Vertical work position correction | −2.54 mm | +2.54 mm |
| Tooth height curvature correction at 2.54 mm contact area narrowing | Roll ratio correction | −0.06922 | +0.04336 |
| Length correction at 1.27 mm contact area lengthening | Wheel diameter correction | −1.27 mm | +1.27 mm |
| Length correction at 1.27 mm contact area lengthening | Radial cutter position correction | −0.199 mm | +0.192 mm |
| Length correction at 1.27 mm contact area lengthening | Cutter rotation correction | −0.22° | +0.20° |
| Length correction at 1.27 mm contact area lengthening | Bed position correction | +0.104 mm | −0.106 mm |
The contact area of a spiral bevel gear pair is a critical quality control target. The length, width, position, and shape of the contact area determine the noise level and the load distribution after loading. In actual production, I use the rolling inspection machine to observe the contact pattern and then apply the proportional corrections to change the contact area size, position, and direction. The contact area correction methods I use on the Phoenix grinder are listed in Table 5. Because the wheel shape can be dressed to almost any form, the grinder has greater flexibility in contact area correction than a mechanical cutting machine.
| Correction item | Method |
|---|---|
| Move contact area toward the heel | Proportional correction; reduce radial cutter position |
| Move contact area downward | Reduce wheel pressure angle; initial value 0.1° |
| Lengthen contact area | Proportional correction; reduce wheel diameter |
| Narrow contact area | Proportional correction; add wheel profile radius of curvature, positive initial value 2500; reduce wheel profile radius of curvature |
| Correct diagonal | Proportional correction |
The contact pattern correction is not a one-time adjustment. I inspect the spiral bevel gear after each correction and iterate until the contact area meets the drawing requirement. The interaction between the wheel profile, the machine settings, and the heat-treatment distortion means that the final correction must be based on the actual measured contact pattern rather than on a theoretical calculation alone. I have found that a small change in wheel profile radius or pressure angle can have a large effect on the contact area, so I make adjustments in small steps and re-inspect.
After grinding, the spiral bevel gear accuracy improves significantly. The main technical indicators are compared in Table 6. In my experience, the gear accuracy reaches grade 4–6, the tooth surface roughness reaches Ra = 0.4 μm, and the noise is below 75 dB. In a vehicle road test, I accelerate to 70 km/h and measure the noise at 350 mm directly above the axle inside the vehicle. The maximum acceleration noise is 80–85 dB, and the coasting noise in gear is 75–85 dB. This is more than 15 dB lower than an unground spiral bevel gear product. The improvement in load capacity and life is equally important because the ground tooth surface has a more favorable contact pattern and a lower roughness.
| Technical indicator | Conventional gear | Ground spiral bevel gear |
|---|---|---|
| Gear accuracy | Grade 7–9 | Grade 4–6 |
| Tooth surface roughness Ra | 1.6 μm | 0.4 μm |
| Noise | 83–88 dB | Below 75 dB |
| Load capacity | Baseline | Significantly improved |
| Service life | Baseline | Extended |
The grinding process for a spiral bevel gear also benefits from the use of the Waguri method in high-volume production. The eccentric motion creates a gap that allows coolant to reach the grinding zone, so the wheel can remove more material per cycle without burning the tooth surface. I have used this method to grind forming-method gears with a straight cup wheel, which avoids the cost of a special spread cup wheel. The additional rotating mechanism is a small price to pay for the increase in productivity and the reduction in burn risk. For a spiral bevel gear with a large module and a large tooth depth, the Waguri method is especially effective because the coolant can penetrate the deep slot and the chips can escape more easily.
The wheel wear compensation is closely related to the grinding cycle time. When the cycle time is long, the wheel wears more between the first and last tooth, and the pitch error becomes larger. I reduce the cycle time by increasing the wheel speed within the allowable range, by optimizing the feed rate, and by using a wheel with a sharper topography. However, I never increase the removal rate beyond the point where burn begins. The optimum is a balance between productivity and thermal safety. I determine this balance by measuring the burn depth and the crack density after each parameter change. The spiral bevel gear is a safety-critical component in many applications, so I prefer a slightly conservative removal rate with a stable wheel condition rather than an aggressive rate that risks hidden damage.
The dressing process also affects the wheel topography and therefore the grinding force and heat. A sharp wheel with open porosity cuts with a lower force and generates less heat, but it wears faster. A dull wheel cuts with a higher force and generates more heat, but it holds its form longer. I use a sharp wheel for roughing and a slightly duller wheel for finishing, but I never let the wheel become so dull that the grinding force rises excessively. The dresser-to-wheel speed ratio is the main control variable. A positive ratio produces a sharp wheel, and a negative ratio produces a dull wheel. I use the positive ratio for finishing because it gives a better surface roughness on the spiral bevel gear. I use the negative ratio for roughing because it gives a more stable wheel form and a higher material removal rate.
The coolant nozzle position is a small detail with a large effect. I set the nozzle at 30°–40° to the wheel and as close as possible without interference. The coolant must be directed into the grinding zone, not at the outside of the wheel. If the nozzle is too far away, the coolant stream breaks up before it reaches the contact zone. If the nozzle is at the wrong angle, the wheel does not carry the coolant into the gap. I check the coolant flow visually and by measuring the temperature of the coolant return. A rise in return temperature indicates that more heat is entering the coolant, which can be a sign of insufficient flow or a change in the grinding condition. I also check the coolant concentration and pH regularly because these affect cooling and rust prevention.
The heat-treatment quality is the foundation of a good spiral bevel gear grinding result. If the carburized layer has network carbides or excessive retained austenite, no grinding parameter can completely prevent burn. I therefore work closely with the heat-treatment process to control the surface carbon, the carbide morphology, the retained austenite, and the residual stress. I use a moderate quenching speed and a long, high-temperature temper. This gives a surface that is hard but not brittle, with a compressive residual stress pattern that resists crack initiation. When the heat treatment is correct, the grinding process has a much wider process window, and the spiral bevel gear can be ground efficiently without damage.
The stock distribution is also affected by heat-treatment distortion. If the gear distorts during quenching, the stock on one flank may be much larger than on the other flank. When I grind such a gear, the flank with more stock requires a larger depth of cut, which generates more heat and may burn. I reduce this risk by measuring the distortion after heat treatment, by aligning the gear accurately on the grinder, and by using a stock divider to equalize the stock. If the distortion is too large, I may need to correct the cutting process before heat treatment so that the grinding stock is more uniform. This is an example of how the spiral bevel gear grinding process is connected to the upstream manufacturing steps.
The measurement of the spiral bevel gear after grinding includes pitch error, tooth thickness, profile error, lead error, and contact pattern. I use a gear measuring center for the numerical errors and a rolling inspection machine for the contact pattern. The pitch error is especially important because it is directly related to the wheel wear compensation. The tooth thickness is important because it determines the backlash. The profile and lead errors are important because they determine the contact pattern and the noise. The contact pattern is important because it determines the load distribution. I record all of these measurements and use them to adjust the machine settings and the wheel dressing. This closed-loop approach is the only way to maintain consistent quality in a spiral bevel gear grinding process.
The proportional correction method is a way to transfer the experience from cutting to grinding. The cutting machine settings are known, and the grinding machine settings can be derived from them by proportional relationships. This is much faster than starting from scratch. I use the proportional correction table to determine how much to change each machine parameter when the contact pattern must be moved or reshaped. The corrections are not arbitrary; they are based on the geometry of the spiral bevel gear and the kinematics of the generating process. When I apply the corrections, I always verify the result on the rolling inspection machine. If the contact pattern does not match the expected change, I check the wheel profile and the machine alignment before making further adjustments.
The wheel profile radius of curvature is one of the most useful variables for contact pattern correction. A positive radius makes the wheel edge concave and the tooth surface convex. A negative radius makes the wheel edge convex and the tooth surface concave. By changing the radius, I can change the lengthwise curvature of the spiral bevel gear tooth surface. This is especially useful for narrowing or widening the contact area. I use an initial value of 2500 mm for a positive radius when I want to narrow the contact area, and I reduce the radius if I need a stronger effect. The radius is dressed into the wheel by the diamond roll, so the dressing process must be accurate and repeatable. I check the wheel profile after dressing with a profile gauge or by grinding a test gear and inspecting the contact pattern.
The pressure angle of the wheel is another important variable. A small change in pressure angle moves the contact area up or down on the tooth surface. I use a reduction of 0.1° as an initial correction when I want to move the contact area downward. The pressure angle is set by the wheel dressing and by the machine setting. If the pressure angle is too large, the contact area may be concentrated at the tooth top or root, which is undesirable. If the pressure angle is too small, the contact area may be too wide or may not be stable under load. I adjust the pressure angle in small steps and re-inspect the contact pattern after each change.
The wheel diameter is also used for contact area correction. A reduction in wheel diameter lengthens the contact area. This is because the wheel curvature changes relative to the tooth surface curvature. I use the proportional correction table to determine the amount of wheel diameter change needed for a given contact area length change. The wheel diameter is also related to the wheel surface speed, so I must adjust the wheel speed when I change the wheel diameter to maintain the same surface speed. The wheel diameter correction is a powerful tool, but it must be used carefully because it affects both the contact pattern and the grinding conditions.
The contact area correction is an iterative process. I start with the theoretical machine settings, grind a test gear, inspect the contact pattern, and apply the proportional corrections. I repeat this until the contact pattern meets the specification. The number of iterations depends on the initial settings and the heat-treatment distortion. With experience, I can reduce the number of iterations by using the proportional correction table and by understanding how each parameter affects the contact pattern. The spiral bevel gear contact pattern is the final proof of the entire process, so I never skip the rolling inspection.
In my conclusion, the grinding of a spiral bevel gear is a multi-variable process that requires control of the machine, the wheel, the grinding parameters, the dressing, the wear compensation, the cooling, and the heat treatment. The use of a CNC hypoid grinder such as the Phoenix 800G allows me to generate complex tooth surfaces by coordinated axis motion. The Waguri method allows me to grind forming-method gears with a straight cup wheel and avoid burn. The SG wheel gives high productivity and good surface quality. The wheel dressing and wear compensation keep the tooth thickness and pitch within tolerance. The proportional correction method gives me a systematic way to adjust the contact pattern. The burn and crack prevention measures, including heat-treatment control, grinding parameter optimization, and cooling, ensure that the spiral bevel gear is not damaged during grinding. The result is a spiral bevel gear with grade 5–6 accuracy, Ra = 0.4–1.6 μm, and noise below 75 dB. I have applied these methods in production and have found them to be reliable and repeatable. The spiral bevel gear grinding process is therefore not only a finishing operation but a complete manufacturing system that determines the final performance of the gear pair.
For future work, I plan to further study the relationship between wheel topography and grinding heat, the effect of different coolant strategies on burn, and the use of in-process measurement to close the loop between grinding and contact pattern correction. I also plan to investigate the use of CBN wheels for high-speed grinding of the spiral bevel gear, because CBN has higher wear resistance and thermal stability than conventional abrasives. If the wheel speed can be increased and the heat can be controlled, the productivity of the spiral bevel gear grinding process can be further improved without sacrificing quality. I believe that the spiral bevel gear grinding process will continue to evolve toward higher speed, higher accuracy, and higher intelligence, and that the principles I have described will remain the foundation of that evolution.