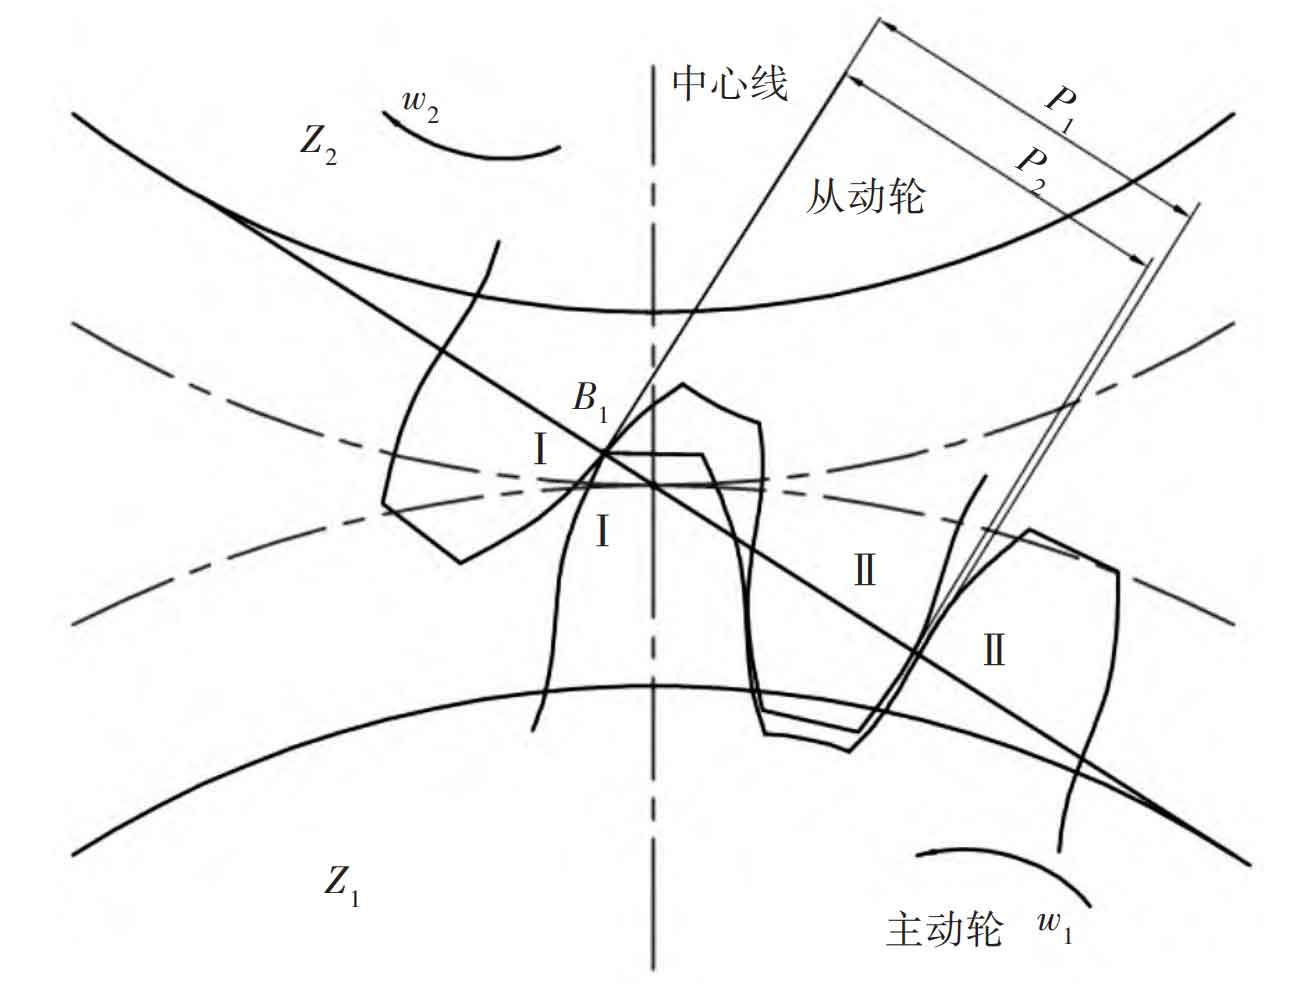
According to the meshing characteristics of spur gear, the gear teeth just entering the mesh do not bear the load, and all the load is borne by the previous pair of teeth. At this time, considering the small deformation, meshing thermal deformation and cutting error after being loaded, the actual base pitch of the driven gear increases, and the actual base pitch of the driving gear decreases, so the actual base pitch of the driven gear is larger than the actual base pitch of the driving gear, as shown in Figure 1. The gear tooth will reach the meshing position in advance, the driven gear tooth top will hit the driving gear tooth root, and the edge angle of the driven gear tooth top will scrape at the driving gear tooth root until it reaches the normal meshing position point. Similarly, the actual base pitch of the driving gear is greater than the actual base pitch of the driven gear when it is disengaged, as shown in Figure 2. Due to the influence of the clearance, the gear tooth will be delayed from meshing. At this time, the top edge of the driving gear tooth will be scraped at the root of the driven gear, and then the load impact will occur on the gear tooth.
In order to solve the above impact problems, the effective way is to carry out the trimming process for the driving and driven gears respectively. The theoretical and practical research results show that this technology can greatly improve the transmission performance of gear teeth, improve the meshing smoothness, and improve its bearing capacity and service life without increasing the production cost and research and development cycle. When designing the trimming amount, the transmission error is mainly analyzed from two aspects: (1) the elastic deformation of the spur gear caused by the load in the working process; (2) The influence of design and manufacturing errors on tooth profile.

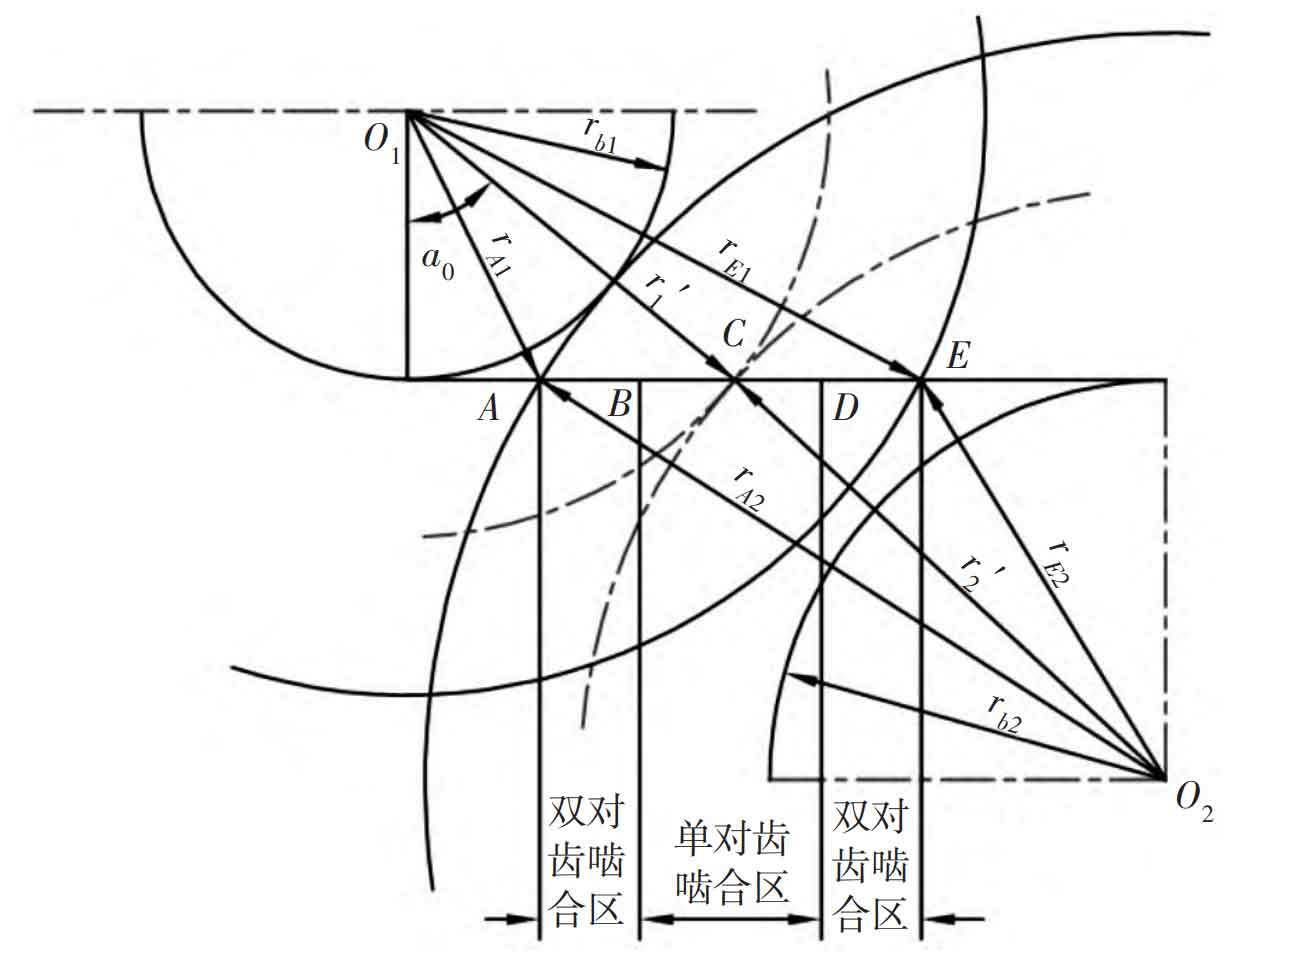
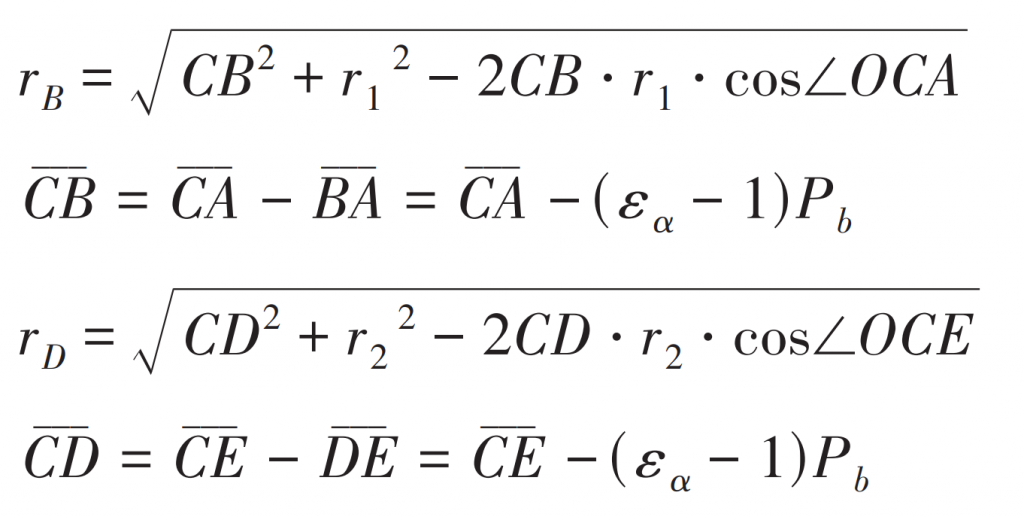
It can be seen from the deformation calculation formula that the calculation of deformation is mainly based on the meshing stiffness, working tooth width and load distribution coefficient between teeth. When using Ishikawa formula to solve the time-varying meshing stiffness, it is necessary to determine the boundary of the single-tooth and double-tooth meshing area, as shown in Figure 3. Where, points B and D are the alternating points of single and double teeth meshing, and the arc radii are rB and rD, which can be obtained from the trigonometric function relationship:

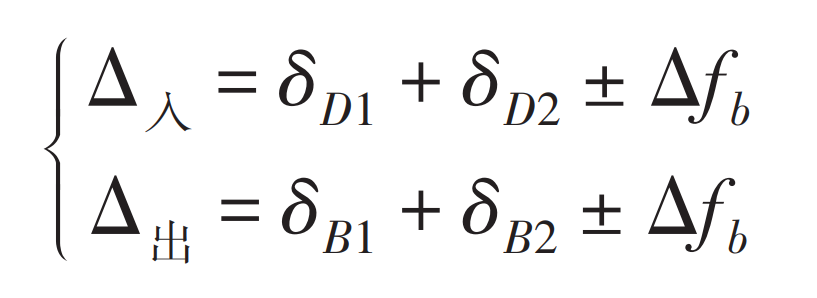
If the influence of some unnecessary error factors is ignored, when the meshing process is at the starting point of the single-tooth meshing area, the previous pair of teeth reaches the end point of the actual meshing line, and the total elastic deformation of the pair of teeth at the end point is taken as the maximum trimming amount of the driving gear tooth top; Similarly, at the end of the single-tooth meshing area, the last pair of teeth reaches the starting point of the actual meshing line, and the total elastic deformation of the pair of teeth at the starting point is used as the maximum trimming amount of the driven gear tooth top. In practical solution, it is usually necessary to consider the manufacturing error of spur gear, base pitch error and thermal deformation to determine the trimming amount, and use this as the upper and lower limits of the tooth profile trimming tolerance zone. Elastic deformation formula:


