The instrument model used for ultrasonic flaw detection is cts-1002 digital ultrasonic flaw detector. As the diameter of steel is Φ 400 mm, according to the standard requirements, the probe is 2.5P Φ 20 straight probe, the coupling agent is oil, the initial sensitivity is fbh2.0 mm, and the scanning speed is adjusted according to the depth of 1:4.
In order to determine the defect location and equivalent size more accurately, the bottom wave method and AVG curve method are used to test and compare, and the more accurate results are obtained.
Bottom wave method
The bottom wave method is used to adjust the sensitivity without considering the material attenuation, and the formula of the difference between the large flat bottom and fbh2.0 mm flat bottom hole echo is used
Where: λ – wavelength; Φ – flat bottom hole diameter; D – steel diameter.
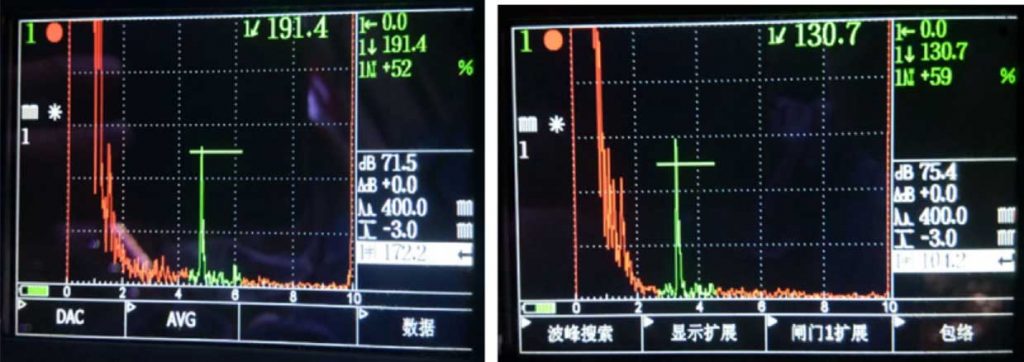
The sensitivity difference between the big flat bottom and fbh2.0 mm flat bottom hole is 44 dB. Adjust the bottom wave to the reference (80%) wave height, and then increase 44 dB for flaw detection and scanning. Through inspection, two discontinuous echoes are found respectively, and the waveform is shown in Fig. 1.

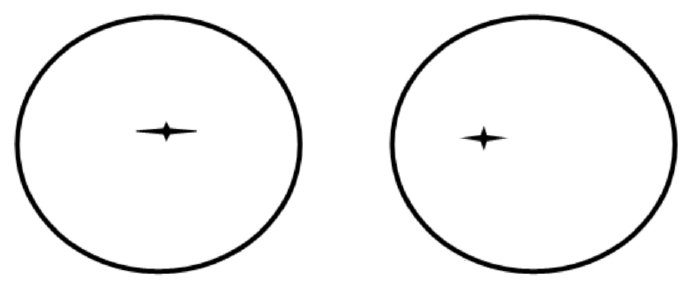
According to the reflected echo of flaw detection defects, the positions of the two defects are measured in the transverse center of the steel, as shown in Fig. 2.

The formula of decibel difference of echo from two flat bottom holes with different distances and different apertures is used
Where: DF1 – initial sensitivity equivalent; df2 – discontinuity equivalent; X2 – defect depth; X1 – steel diameter.
The equivalent size of the first defect is fbh4.0 mm, and the size of the second defect equivalent is fbh4.1 mm.
AVG curve method
The initial sensitivity is fbh2.0 mm. The AVG curve is made by flat bottom, and the steel is scanned for flaw detection. After scanning, two discontinuous echoes are also found. The waveform is shown in Fig. 3.

Using AVG curve automatic measurement function, the first defect equivalent size is fbh4.0 mm, the location depth is 190 mm, the second defect equivalent size is fbh4.0 mm, and the defect depth is 132 mm.
Through the above two methods, the defect location and equivalent size are basically consistent, which further proves that there is a defect in the steel; based on the echo position and waveform of the defect, it is preliminarily judged that the defect is internal crack.
