
My journey into the detailed world of mechanical design and virtual prototyping began with a fundamental yet crucial component: the worm gear speed reducer. This power transmission device, essential for transferring motion between non-parallel, non-intersecting shafts while providing significant speed reduction and torque multiplication, is ubiquitous in applications ranging from conveyor systems to precision machinery. To bridge the gap between theoretical knowledge and practical application, I embarked on a comprehensive project to create a fully detailed three-dimensional model and functional dynamic simulation of a WPA-type worm gear reducer using Pro/ENGINEER (Pro/E). This process of meticulous component modeling, precise assembly, and rigorous motion analysis not only solidified my understanding of gear mechanics but also demonstrated the immense power of modern CAD/CAE tools in engineering design and validation.
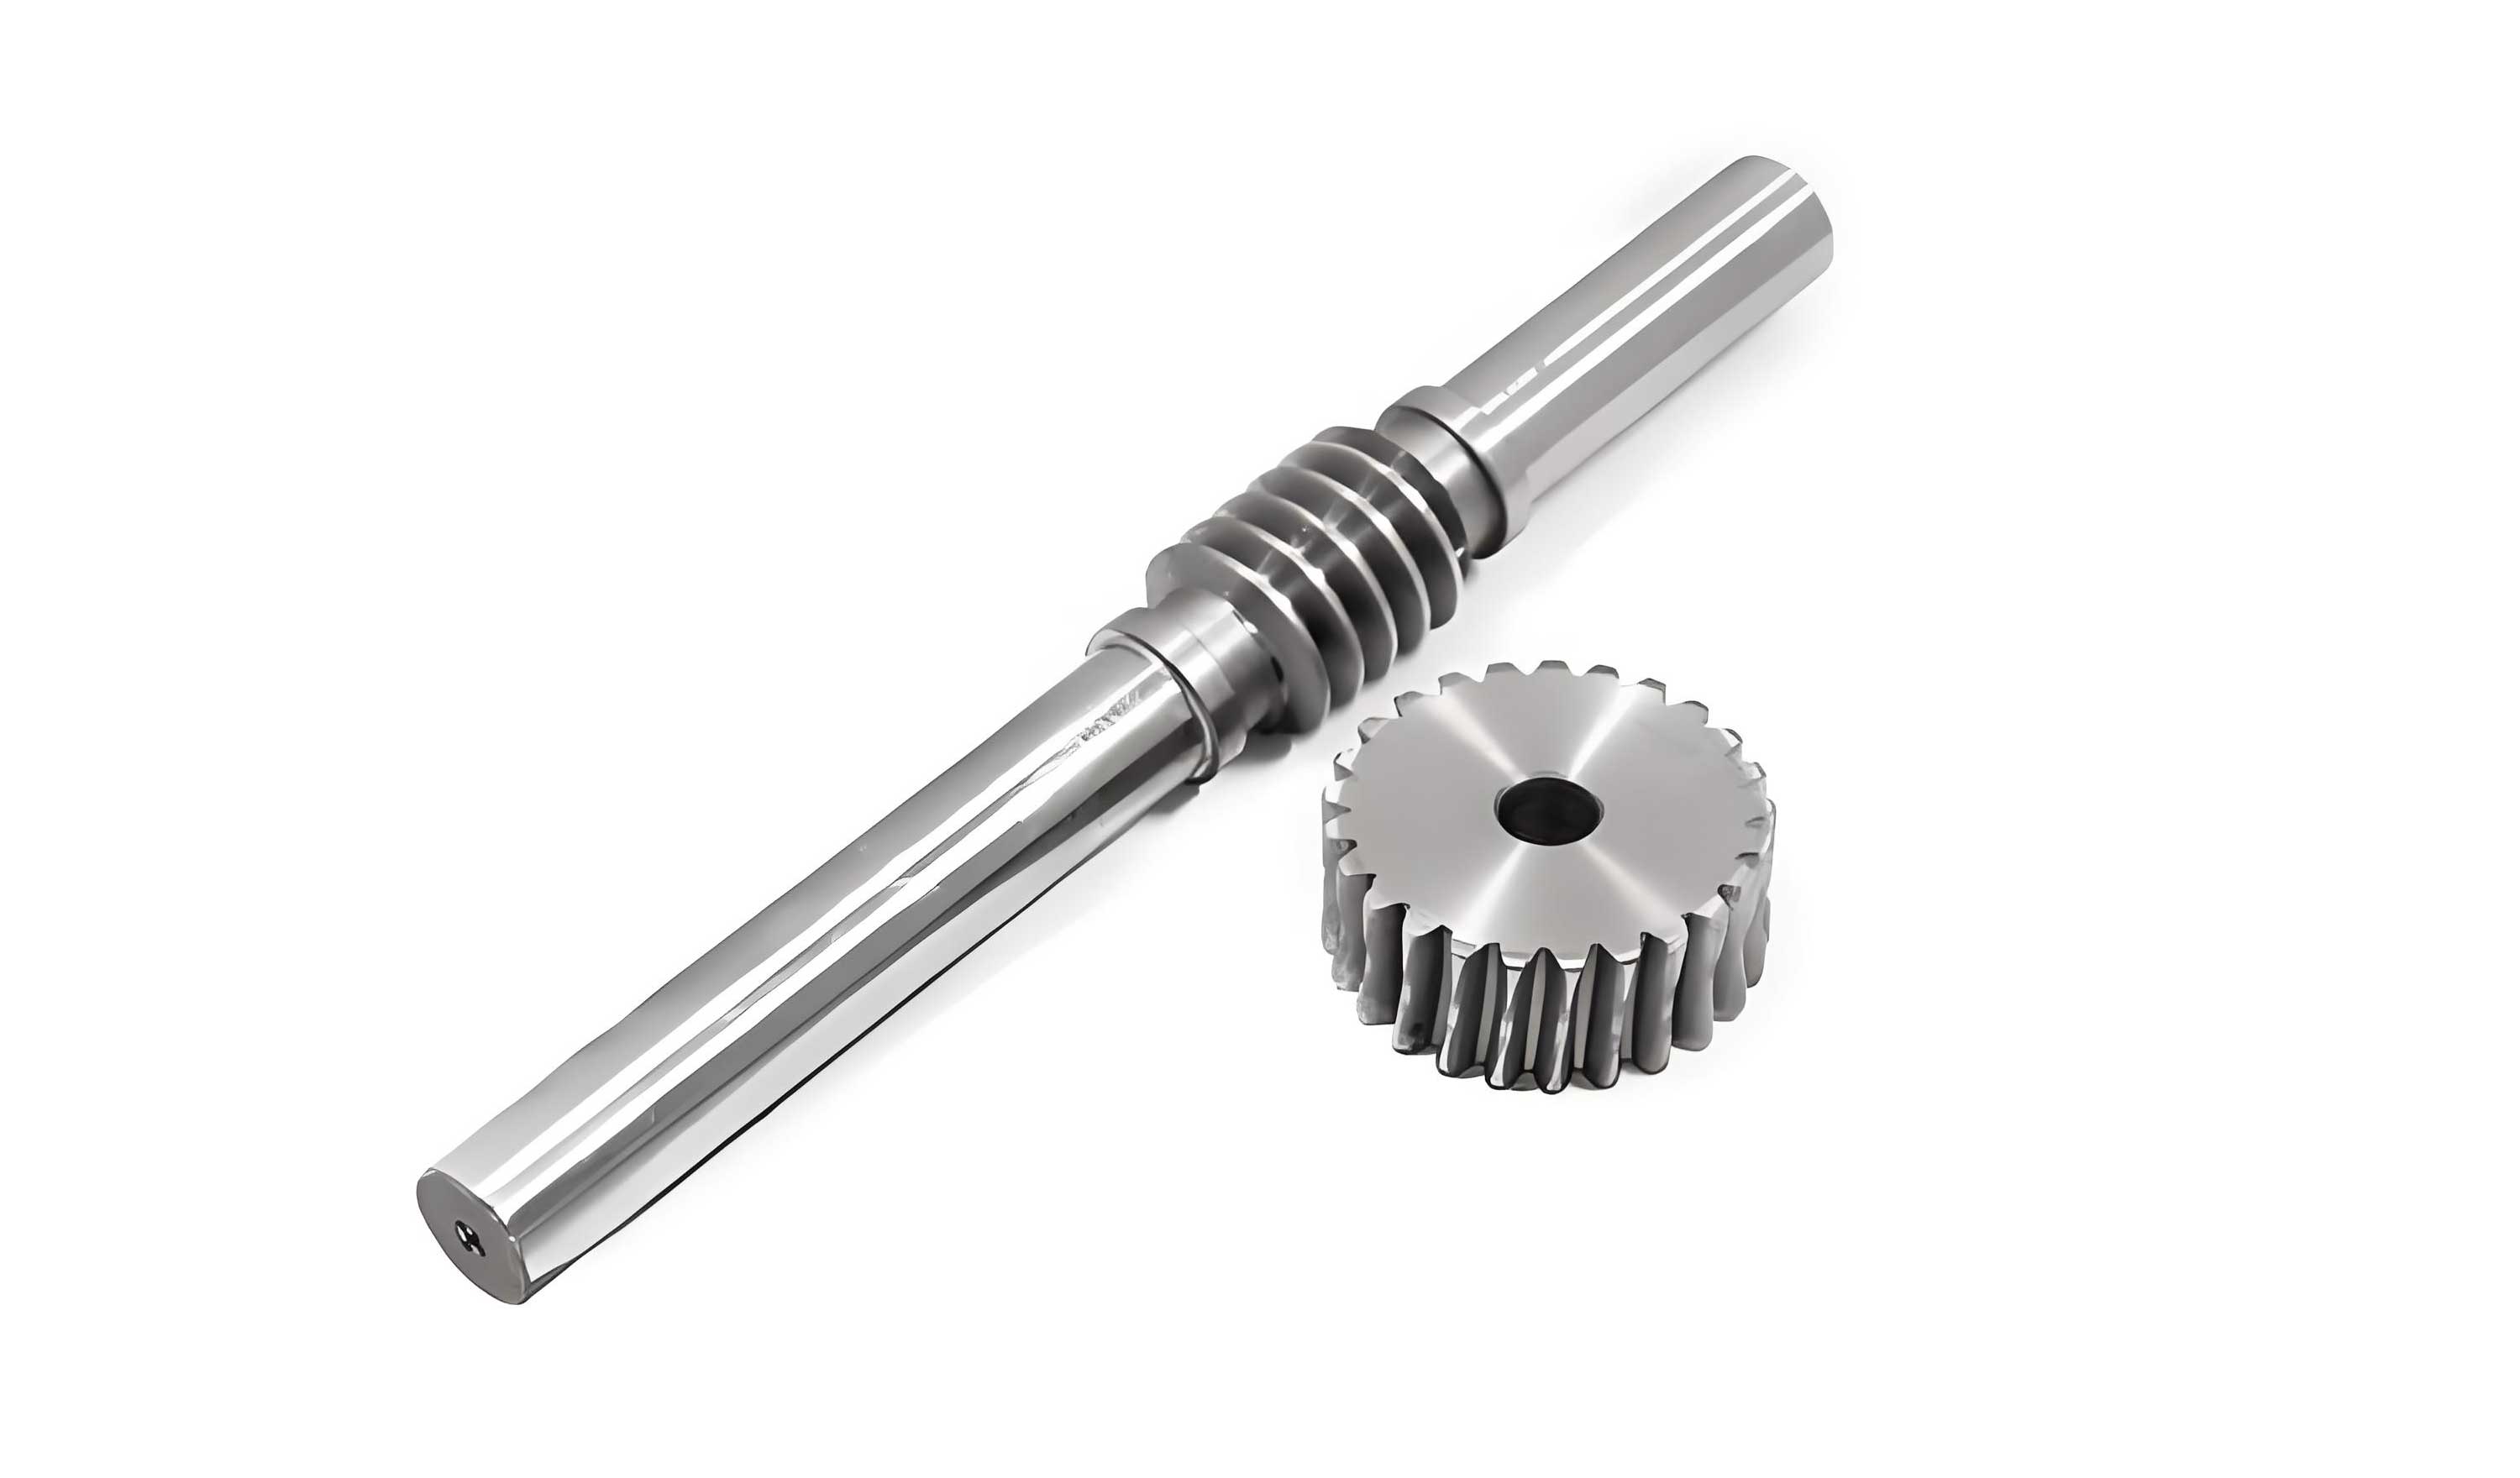
The core of this transmission system is the unique engagement between the worm and the worm wheel. The worm, resembling a threaded screw, meshes with the gear, which has teeth shaped to envelop the worm thread. This configuration allows for compact, high-ratio speed reduction in a single stage, often with self-locking capabilities. The success of a virtual model hinges on accurately representing this complex geometry. The primary parameters governing the design of standard worm gears are defined below.
| Parameter | Symbol | Value (Example) | Description |
|---|---|---|---|
| Axial Module | $m_x$ | 1.5 mm | Defines the tooth size in the axial plane of the worm. |
| Number of Worm Threads (Starts) | $Z_1$ | 1 | The number of helical threads on the worm shaft. |
| Number of Worm Wheel Teeth | $Z_2$ | 40 | The total number of teeth on the worm gear. |
| Pressure Angle | $\alpha$ | 20° | The angle between the line of action and the tangent to the pitch circle. |
| Lead Angle | $\gamma$ | Calculated | The angle of the worm thread relative to a plane perpendicular to its axis. |
| Center Distance | $a$ | Calculated | The distance between the axes of the worm and the worm wheel. |
The lead of the worm ($p_z$), which is the axial distance the thread advances in one complete turn, is calculated as $p_z = \pi \cdot m_x \cdot Z_1$. For a single-start worm with $m_x=1.5$, the lead is $p_z = \pi \cdot 1.5 \cdot 1 = 4.712 \text{ mm}$. The lead angle $\gamma$ is then derived from the pitch diameter of the worm ($d_1$) and the lead: $\tan(\gamma) = \frac{p_z}{\pi \cdot d_1} = \frac{m_x \cdot Z_1}{d_1}$. The nominal center distance for a standard design is given by: $$ a = \frac{m_x (q + Z_2)}{2} $$ where $q$ is the diameter quotient ($q = d_1 / m_x$), typically selected from standard tables to ensure proper mesh and strength. The transmission ratio, a key performance metric for worm gears, is simply the ratio of output to input speeds and is determined by the tooth count: $ i = \frac{Z_2}{Z_1} = 40 $ for our example. The efficiency of the worm drive is heavily influenced by the lead angle and the coefficient of friction $\mu$: $$ \eta \approx \frac{\tan(\gamma)}{\tan(\gamma + \rho’)} $$ where $\rho’$ is the equivalent friction angle, $\rho’ = \arctan(\mu / \cos \alpha_n)$.
Comprehensive 3D Modeling in Pro/ENGINEER
The modeling phase requires a structured, bottom-up approach. Each component must be created with precise geometry before assembly.
1. Modeling the Worm Shaft
Creating an accurate worm model in Pro/E can be achieved through a helical sweep feature. The process involves first creating a cylinder for the worm’s root diameter. A helical cut is then made using a trapezoidal profile that matches the gear tooth specifications. The critical parameters for the helical sweep are the pitch (equal to the lead, $p_z$) and the section profile defined by the module and pressure angle. For standard modules, Pro/E’s built-in gear libraries (if available through toolkits) can expedite this process. However, a manual sweep provides complete control over the geometry, ensuring the worm thread accurately mates with the worm wheel tooth space. The ends of the shaft are then extended and features for bearing seats and seals are added using rotational and extrusion features.
2. Modeling the Worm Wheel
The worm wheel is more complex due to its throated shape, which wraps around the worm. The general procedure is as follows:
- Create the Gear Blank: Revolve a profile to create the main body of the gear, including the hub and web.
- Generate a Single Tooth Space: This is the most critical step. Using the concept of an “imaginary rack” that matches the worm’s thread geometry, a swept cut is performed. The cut path follows the arc of the gear’s pitch circle, and the cutting tool profile is the inverse of the worm thread’s axial section. Advanced techniques involve using a variable section sweep or equations to precisely control the tooth form.
- Pattern the Tooth Space: Once a single tooth gap is correctly modeled, a circular pattern feature is used to create all $Z_2$ teeth around the wheel’s axis.
The resulting three-dimensional model of the worm wheel should clearly show the concave profile of its teeth, perfectly shaped to engage with the convex profile of the worm thread.
3. Modeling the Housing (Gearbox)
The housing is a complex cast or machined part that serves as the foundation for the entire assembly. Its modeling is iterative and involves numerous features:
- Main Cavity: A base extrusion defines the external envelope. Shell and internal extrusion features create the main cavity that houses the worm gears assembly.
- Bearing Bores: Concentric holes are extruded on both sides of the worm and worm wheel axes. These must be precisely aligned and sized for the selected bearing outer rings (e.g., 6202 for the worm shaft, 6203 for the worm wheel shaft).
- Ribs and Stiffeners: To ensure structural rigidity without excessive weight, ribs are added using thin extrusion features between the bearing bosses and the outer walls.
- Mounting Feet and Flanges: Extrusions are added to the base and sides for mounting the reducer and attaching covers.
- Oil Sealing Surfaces and Bolt Hole Patterns: Seals require specific surface finishes and grooves. Bolt holes for the front and rear covers are created using hole features with circular patterns.
- Auxiliary Features: Finally, features for the breather plug, oil drain plug, and sight glass (if any) are added.
This process requires constant reference to datum planes and careful feature ordering to maintain design intent and ease of modification.
4. Modeling Bearings, Shafts, and Standard Components
Other components, while simpler, are essential for a complete assembly.
| Component | Modeling Strategy | Key Features |
|---|---|---|
| Input/Output Shafts | Revolve profiles based on mechanical design calculations for torsion and bending. | Keyways (extruded cuts), splines, bearing seats, threading for locknuts. |
| Deep Groove Ball Bearings (6202, 6203) | Simplified representation: Revolve inner/outer rings and create a patterned array of spheres for balls. | Critical dimensions: Inner/outer diameter, width. Constraint: Must fit housing bore and shaft seat. |
| End Covers | Extrude main disc, add features for seal recess, O-ring groove, and through-holes for bolts. | Often includes a labyrinth or lip seal contact surface. |
| Gaskets | Extrude a thin sheet body using the cover’s mating surface as a reference. | Thickness defined by gasket material (e.g., 0.5-1.5mm). |
| Hex Bolts, Nuts, Washers | Use Pro/E’s pattern library or create simple revolved shapes with helical sweeps for threads. | Standard sizes (M6, M8). Threads can be symbolic for performance. |
Precision Assembly and Constraint Management
With all parts modeled, the assembly phase brings the system to life. Pro/E’s assembly module uses constraints to define the spatial relationships between components. A logical sub-assembly approach is highly recommended.
Sub-Assembly 1: Worm Shaft Assembly
- Place the worm shaft as the base component (default constraint).
- Assemble the two bearings (6202) onto the shaft. Use Insert constraints to align the bearing inner race with the shaft’s bearing seats and Mate constraints to position the bearing faces against the shaft shoulders.
- Assemble any spacers or locknuts in a similar manner.
This sub-assembly is treated as a rigid component in the main assembly.
Sub-Assembly 2: Worm Wheel Shaft Assembly
- Place the worm wheel shaft as the base component.
- Assemble the key onto the shaft using Mate and Insert.
- Assemble the worm wheel onto the shaft and key. Constraints: Insert for the bore, Mate for the hub face against a shoulder, and an Orientation angle to align a keyway.
- Assemble the bearings (6203) and other components onto the shaft.
Main Assembly: Integrating Components into the Housing
The main assembly sequence is critical for avoiding constraint conflicts.
| Step | Component(s) | Primary Constraints | Purpose |
|---|---|---|---|
| 1 | Housing | Default (Fixed) | Establish the assembly coordinate system. |
| 2 | Worm Shaft Sub-Assy | Insert (Bearing OD to Housing Bore), Mate (Bearing face to Housing shoulder) | Aligns worm axis with housing bore axis. |
| 3 | Worm Wheel Shaft Sub-Assy | Insert (Bearing OD to Housing Bore), Mate (Bearing face to Housing shoulder) | Aligns wheel axis perpendicular to and offset from the worm axis by center distance $a$. |
| 4 | End Covers | Align (Cover holes to Housing threads), Mate (Cover face to Housing face) | Secures the assemblies axially and provides sealing surface. |
| 5 | Bolts, Nuts, Washers | Insert (Bolt shank to hole), Mate (Bolt head to washer/cover) | Fastens the covers. Can be patterned after placing one instance. |
| 6 | Seals, Plugs, etc. | Insert / Mate | Completes the assembly. |
After full assembly, an Exploded View is created to visualize the assembly sequence and spatial relationship of all parts. This is invaluable for technical documentation and manufacturing instructions.
Dynamic Motion Simulation and Analysis
Pro/E’s Mechanism Design extension allows for kinematic and dynamic simulation. The goal is to animate the reducer and verify motion without physical interference.
1. Defining Connections
During assembly, components must be connected with appropriate joint types, not just rigid constraints. For the worm gear reducer:
- Worm Shaft: A Pin connection is assigned to its sub-assembly, defining its axis of rotation relative to the housing.
- Worm Wheel Shaft: Similarly, a Pin connection is defined for its axis of rotation.
All other parts (covers, bolts, housing) are left as Rigid connections fixed to the ground (housing).
2. Defining the Gear Pair
This is the core of the simulation, defining the kinematic relationship between the worm and the wheel. In Pro/E Mechanism, a Worm gear pair is created.
- Select the motion axis of the worm’s Pin connection as Gear 1.
- Select the motion axis of the worm wheel’s Pin connection as Gear 2.
- Define the gear ratio. For a kinematic simulation, the ratio is based on the number of teeth: $$ \text{Ratio} = \frac{Z_2}{Z_1} = 40 $$ This is entered as a velocity ratio. Some advanced setups allow specifying the helical hand and lead angle for more accurate dynamic torque calculations.
3. Applying a Servo Motor and Running Analysis
To drive the mechanism, a Servo Motor is applied to the worm shaft’s motion axis. A simple constant velocity profile can be defined, e.g., 100 deg/sec. A Kinematic Analysis is then defined, specifying the motor, duration (e.g., 36 seconds for 10 full worm rotations), and frame rate. Upon running the analysis, Pro/E solves the positions of all components over time based on the defined joints and gear pair.
4. Results and Interference Check
Using the Playback feature, the smooth meshing motion of the worm gears can be observed. Crucially, a Global Interference Check can be run over the entire motion sequence to ensure no parts (like gear teeth) incorrectly penetrate each other, validating the geometric accuracy of the models. The motion can be exported as a video file for presentation purposes.
Advanced Applications and Integration
The virtual model serves as a digital prototype for extensive engineering analysis, extending far beyond simple motion visualization.
Finite Element Analysis (FEA) Integration
The 3D model can be directly used for structural and thermal analysis. Using Pro/E’s integrated Mechanica module or exporting to dedicated FEA software (like ANSYS):
- Stress Analysis on Gear Teeth: Loads representing the transmitted torque are applied to the worm wheel teeth. Contact analysis between the worm thread and wheel tooth can reveal stress concentrations and bending stresses, verifying that the selected module and material are adequate. The maximum contact stress ($\sigma_H$) for worm gears can be estimated and compared with FEA results: $$ \sigma_H = Z_E \sqrt{\frac{F_t}{d_1 b} \cdot \frac{i+1}{i}} $$ where $Z_E$ is the elasticity factor, $F_t$ is the tangential force, and $b$ is the face width.
- Housing Structural Analysis: The reaction forces from the bearings are applied to the housing bores. A static analysis shows deformation and stress in the housing, ensuring it is sufficiently rigid to maintain proper gear alignment under load.
- Thermal Analysis: Worm gear drives are inefficient and generate significant heat. A thermal analysis can model heat generation from power losses ($P_{loss} = P_{in}(1-\eta)$) and simulate heat dissipation through the housing surfaces and lubricant, predicting steady-state operating temperatures to validate cooling requirements.
Parametric Design and Optimization
By defining key dimensions (module, number of teeth, face width, housing wall thickness) as parameters within Pro/E, a design study can be conducted. The software can automatically iterate through combinations of these parameters to meet multiple objectives, such as:
- Minimizing total mass/volume (for material savings).
- Maximizing power density (torque output per unit volume).
- Constraining maximum tooth bending stress and housing deformation below allowable limits.
This transforms the model from a static representation into a powerful design optimization tool.
Drafting and Manufacturing Preparation
From the validated 3D assembly, detailed 2D engineering drawings are automatically generated. These include:
- Part drawings with dimensions, tolerances (especially for bearing fits and center distance), and geometric tolerances.
- Assembly drawings with a bill of materials (BOM), overall dimensions, and assembly notes.
- Exploded view diagrams for service manuals.
Furthermore, the 3D models of complex parts like the housing and worm wheel can be directly used to program CNC machining tools or create patterns for casting, bridging the gap directly to Computer-Aided Manufacturing (CAM).
Conclusion
This end-to-end project, from initial parameter definition to dynamic simulation and advanced analysis, provides a profound understanding of worm gear reducer design. The process of meticulously building each component in Pro/ENGINEER reinforces knowledge of gear geometry, tolerancing, and assembly design principles. The motion simulation offers immediate visual feedback on the kinematic validity of the design, while the potential for integrated FEA and parametric optimization highlights the role of modern engineering software in creating robust, efficient, and reliable mechanical systems. Mastering the virtual prototyping of fundamental components like worm gears is an indispensable competency, forming a solid foundation for tackling more complex engineering design challenges in the future. The digital model becomes a single source of truth, facilitating analysis, communication, and manufacturing in a seamlessly integrated workflow.