
In my experience as a gear manufacturing engineer, the precise machining of miter gears—specifically straight bevel gears with a shaft angle of 90 degrees—is critical for ensuring smooth power transmission in various mechanical systems. When producing these gears in batches, maintaining the accuracy of the gear shaping or planing machines is paramount. To achieve this, the rough cutting operation is often performed on a milling machine, which helps preserve the precision of the gear planer during the final finishing process. This approach ensures that the cutting allowance for the finishing operation is uniform across the tooth profile, leading to higher accuracy in the final gear. The core of this method lies in calculating the tooth thickness at both the large end and small end of the miter gear during rough milling, so that appropriate allowances are left for the subsequent planing. In this article, I will delve into the detailed methodology for these calculations, incorporating formulas, tables, and practical insights to guide engineers and machinists.
The fundamental principle behind rough milling a miter gear tooth is essentially a quantitative translation of the tooth profile relative to the ideal profile. At the large end of the gear, the ideal tooth shape is offset by a specific amount to create a thicker tooth that will later be planed down to the exact dimensions. This translation ensures that the finishing cut removes a consistent layer of material, preventing issues such as incomplete tooth form or excessive wear on the cutting tools. For miter gears, which are a subset of bevel gears with equal diameters and 90-degree shaft angles, this process is even more crucial due to their symmetrical nature and high precision requirements in applications like differential drives and right-angle transmissions.
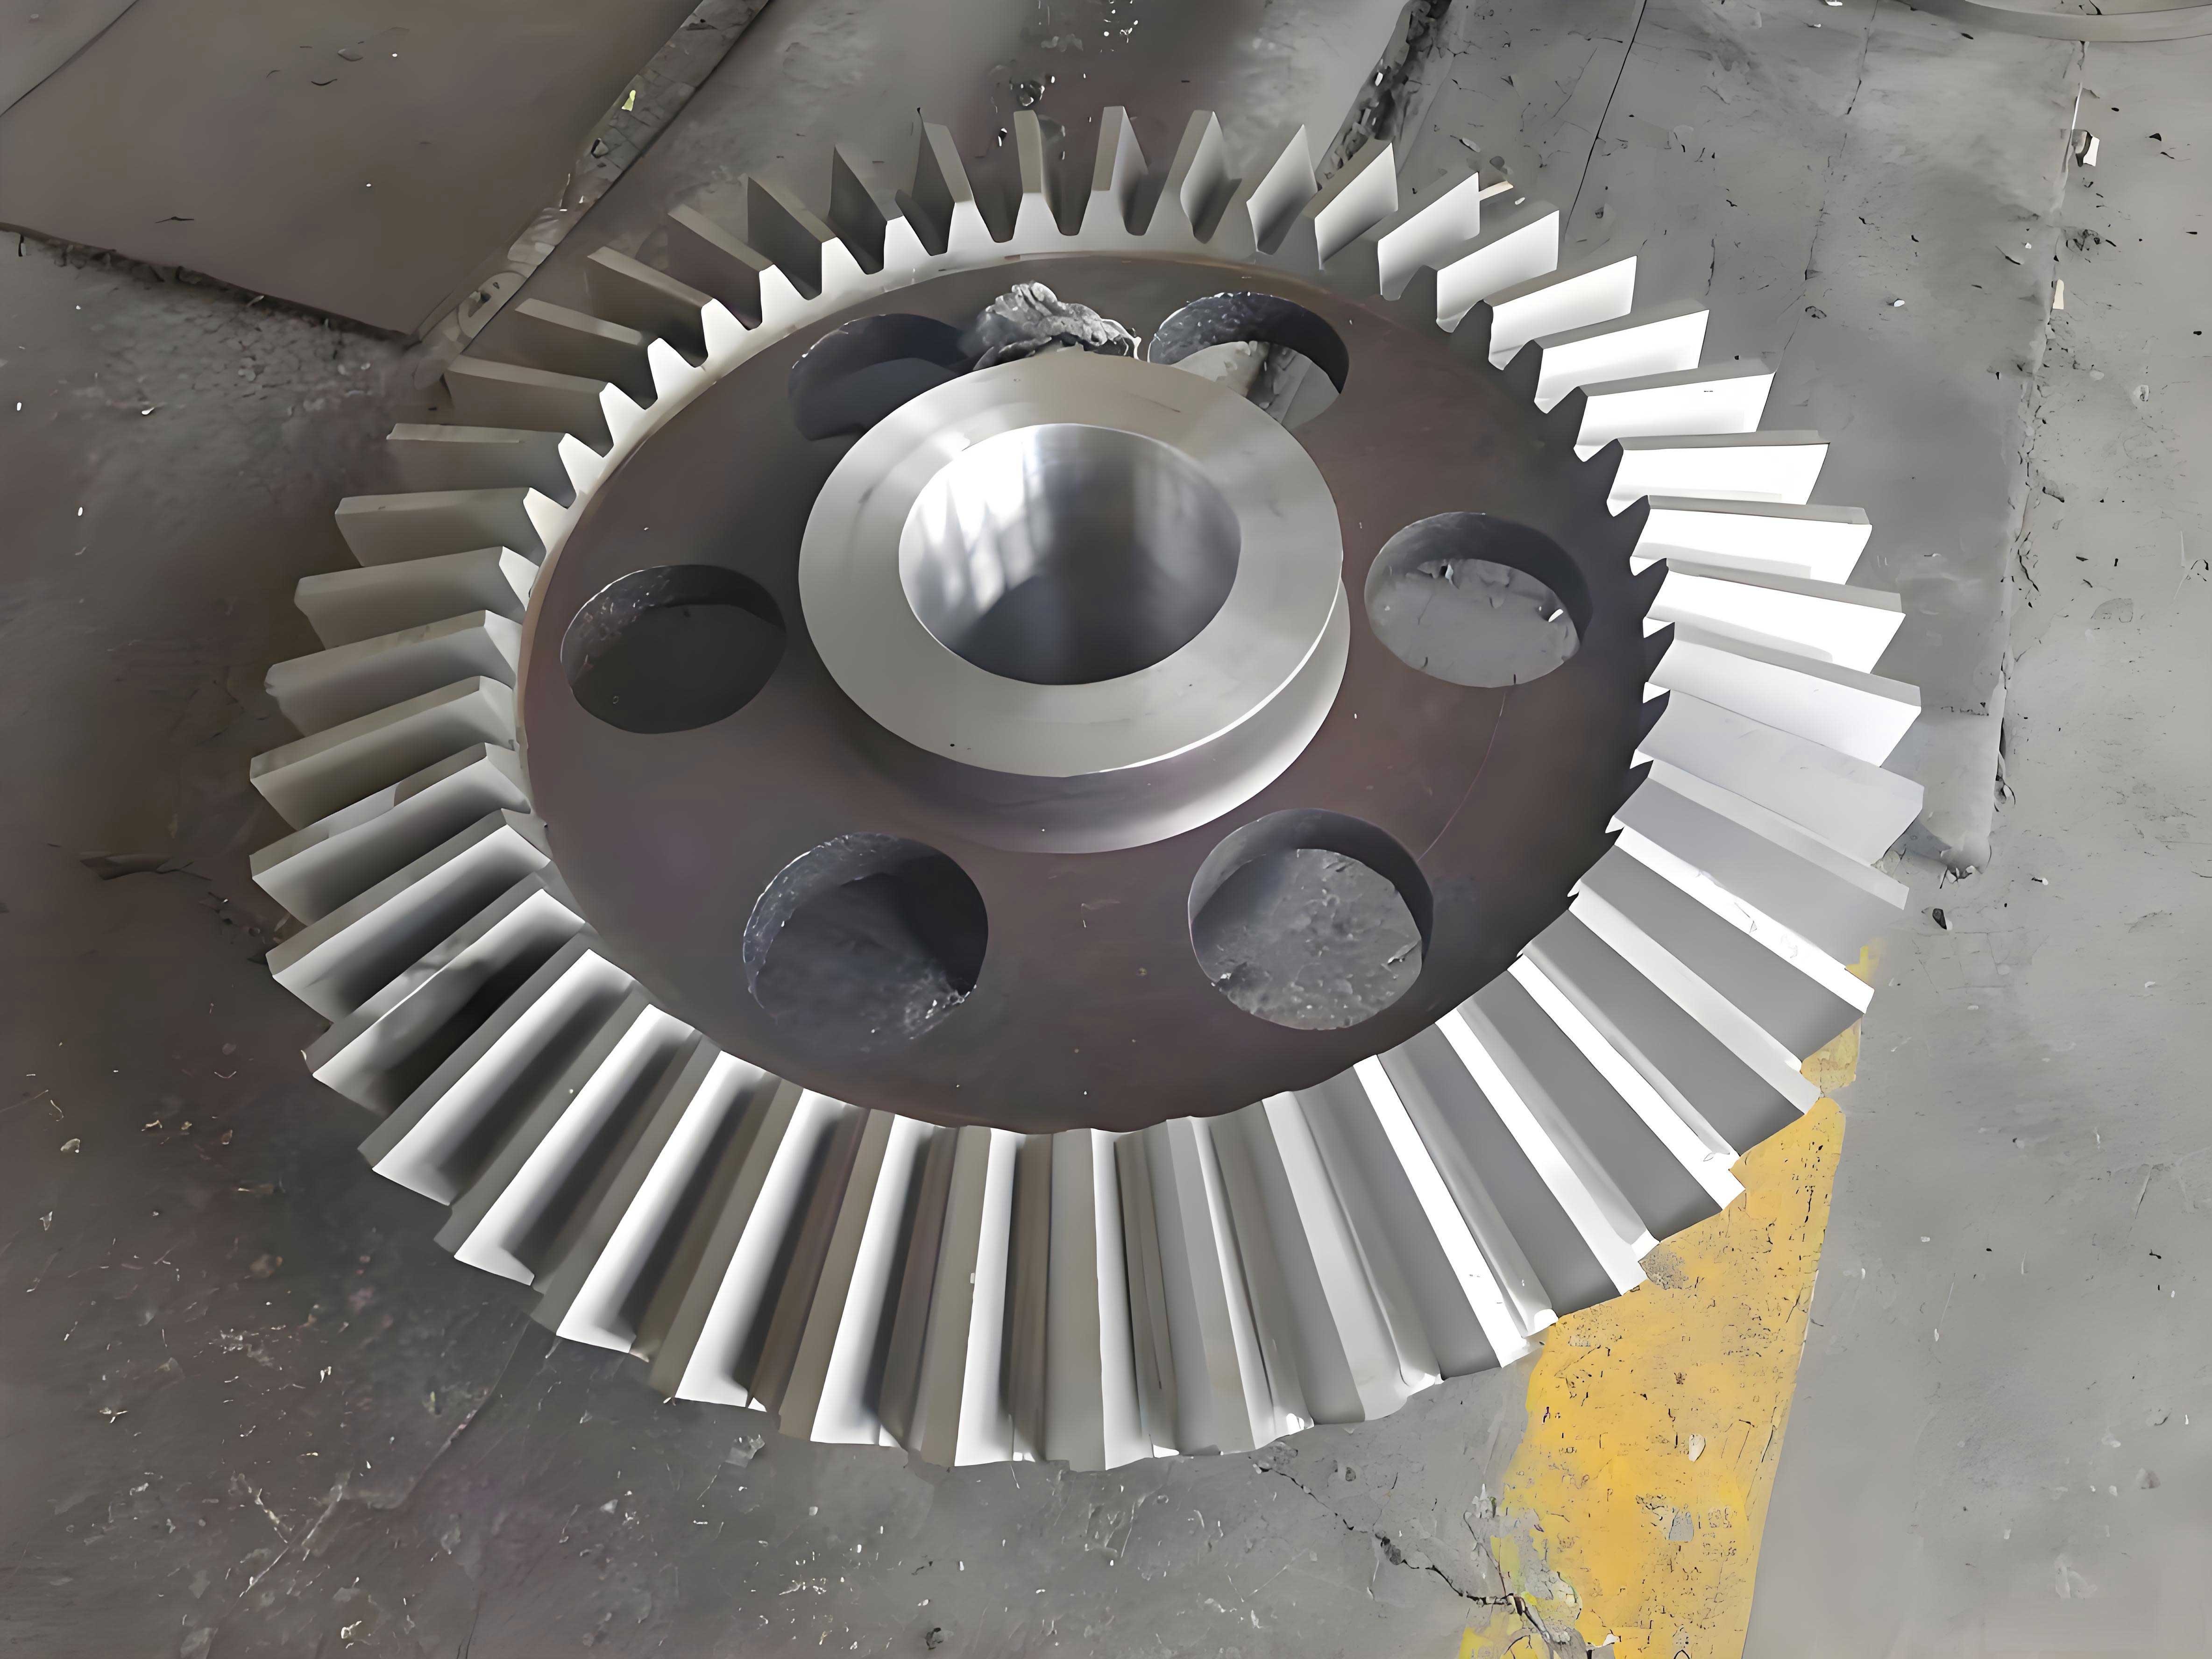
To understand the tooth thickness calculation, let’s start with the basic geometry of a miter gear. The key parameters include the cone distance (R), face width (b), large-end addendum (h_a), and the tooth thickness at the large-end pitch circle. In standard gear design, the tooth thickness is often specified at the pitch circle, but for machining purposes, it is more practical to work with chordal tooth thickness and chordal addendum, as these are easier to measure directly on the gear blank. The large-end pitch chordal tooth thickness, denoted as s̄_o, and the large-end chordal addendum, denoted as ħ_a_o, are derived from the gear’s basic dimensions. During rough milling, we leave an allowance Δs_o at the large end, so the actual chordal tooth thickness to be milled becomes s̄_o + Δs_o at the chordal addendum ħ_a_o.
Similarly, at the small end of the miter gear, the tooth profile is also translated, but the amount of translation differs due to the taper of the gear. The small-end pitch chordal tooth thickness, s̄_i, and chordal addendum, ħ_a_i, are calculated based on the gear’s geometry. To ensure uniform finishing allowance, the small-end tooth thickness during rough milling should be s̄_i + Δs_i, where Δs_i is the allowance corresponding to the large-end allowance Δs_o. The relationship between Δs_o and Δs_i is derived from the proportional reduction along the cone distance. Essentially, as we move from the large end to the small end, the tooth dimensions scale down, and so does the allowance. This ensures that when the gear is later planed, both ends have a suitable and consistent material layer to be removed, avoiding scenarios where the small end might have too little or too much material, which could compromise the gear’s accuracy and strength.
The calculation hinges on the geometry of the miter gear’s tooth profile. Consider the pitch cone of the gear: the large-end pitch circle has a radius r_o, and the small-end pitch circle has a radius r_i. The cone distance R is the slant height of the pitch cone, and the face width b is the length along the cone from the large end to the small end. The relationship between the large-end and small-end dimensions can be expressed using similar triangles. For a miter gear, where the pitch angles are 45 degrees due to the 90-degree shaft angle, the calculations simplify somewhat, but the general principles apply to all straight bevel gears.
Let me define the key variables for clarity:
| Symbol | Description | Unit |
|---|---|---|
| R | Cone distance | mm |
| b | Face width | mm |
| m | Module at large end | mm |
| z | Number of teeth | – |
| s_o | Large-end pitch circle tooth thickness | mm |
| s̄_o | Large-end chordal tooth thickness | mm |
| ħ_a_o | Large-end chordal addendum | mm |
| Δs_o | Large-end finishing allowance | mm |
| s_i | Small-end pitch circle tooth thickness | mm |
| s̄_i | Small-end chordal tooth thickness | mm |
| ħ_a_i | Small-end chordal addendum | mm |
| Δs_i | Small-end finishing allowance | mm |
The chordal tooth thickness and chordal addendum are calculated from the circular tooth thickness and addendum using standard gear formulas. For a gear with pressure angle α, the chordal tooth thickness at the pitch circle is given by:
$$ \bar{s} = s – \frac{s^3}{24r^2} $$
where s is the circular tooth thickness and r is the pitch radius. The chordal addendum is:
$$ \bar{h}_a = h_a + \frac{s^2}{4r} $$
Here, h_a is the addendum. For a miter gear, these formulas apply at both ends, but with adjusted radii. The large-end pitch radius r_o = m z / 2, and the small-end pitch radius r_i = r_o – b sin(γ), where γ is the pitch cone angle. For a miter gear with shaft angle Σ = 90°, the pitch cone angle γ = 45° if the gears are equal, but in general, it depends on the gear ratio. However, for standard miter gears, γ = 45°.
Now, for the rough milling process, the key is to determine the allowances. The large-end allowance Δs_o is typically chosen based on machining handbooks and practical experience, often ranging from 0.1 mm to 0.5 mm depending on the module and material. Once Δs_o is set, the small-end allowance Δs_i can be calculated proportionally. Since the tooth thickness scales linearly along the cone, we have:
$$ \Delta s_i = \Delta s_o \cdot \frac{r_i}{r_o} $$
This ensures that the translation of the tooth profile is consistent. However, in practice, we need to work with chordal dimensions for measurement. Therefore, the rough milling dimensions are specified as chordal tooth thickness at the respective chordal addendum. The large-end rough milling chordal tooth thickness is:
$$ \bar{s}_{o,\text{rough}} = \bar{s}_o + \Delta s_o $$
And the small-end rough milling chordal tooth thickness is:
$$ \bar{s}_{i,\text{rough}} = \bar{s}_i + \Delta s_i $$
To compute these, we first need s̄_o and s̄_i from the ideal gear geometry. For a standard miter gear with module m and tooth count z, the circular tooth thickness at the large-end pitch circle is s_o = π m / 2 for a standard tooth shape. Then, using the chordal formulas:
$$ \bar{s}_o = s_o – \frac{s_o^3}{24 r_o^2} $$
$$ \bar{h}_{a_o} = h_a + \frac{s_o^2}{4 r_o} $$
where h_a = m for standard addendum. Similarly, at the small end, the circular tooth thickness s_i is reduced proportionally: s_i = s_o (r_i / r_o). Then:
$$ \bar{s}_i = s_i – \frac{s_i^3}{24 r_i^2} $$
$$ \bar{h}_{a_i} = h_a \cdot \frac{r_i}{r_o} + \frac{s_i^2}{4 r_i} $$
Note that the addendum at the small end is also scaled by the radius ratio. For miter gears, since the pitch cone angle is 45°, the relationship simplifies. The cone distance R = r_o / sin(γ) = r_o √2 for γ = 45°. The small-end radius r_i = r_o – b sin(γ) = r_o – b/√2.
In many cases, the tooth thickness on a miter gear drawing is specified at the fixed chord rather than the pitch chord. The fixed chord tooth thickness is another measurement method that is independent of the number of teeth for a given module and pressure angle. It is defined as:
$$ s_c = m \cos^2 \alpha $$
for a standard tooth, where α is the pressure angle (commonly 20°). The fixed chord addendum is:
$$ h_c = m \left(1 – \frac{\pi}{8} \sin 2\alpha \right) $$
If the drawing specifies fixed chord dimensions, the same translation principle applies. The large-end fixed chord tooth thickness s_c_o has an allowance Δs_c_o, and the small-end fixed chord tooth thickness s_c_i has an allowance Δs_c_i, calculated proportionally as before. The rough milling dimensions would then be s_c_o + Δs_c_o and s_c_i + Δs_c_i at their respective fixed chord addendums. This method is often preferred for inspection purposes due to its consistency.
To illustrate the calculations, let’s consider an example of a miter gear with the following parameters: module m = 4 mm, number of teeth z = 20, face width b = 30 mm, pressure angle α = 20°, and large-end finishing allowance Δs_o = 0.2 mm. We’ll compute the rough milling dimensions.
First, calculate basic dimensions:
- Large-end pitch radius: r_o = m z / 2 = 4 * 20 / 2 = 40 mm.
- Pitch cone angle for miter gear: γ = 45°.
- Cone distance: R = r_o / sin(γ) = 40 / sin(45°) = 40 / 0.7071 ≈ 56.57 mm.
- Small-end pitch radius: r_i = r_o – b sin(γ) = 40 – 30 * sin(45°) = 40 – 30 * 0.7071 ≈ 40 – 21.21 = 18.79 mm.
Next, tooth thicknesses:
- Large-end circular tooth thickness: s_o = π m / 2 = π * 4 / 2 ≈ 6.2832 mm.
- Small-end circular tooth thickness: s_i = s_o * (r_i / r_o) = 6.2832 * (18.79 / 40) ≈ 2.950 mm.
Now, chordal dimensions at large end:
$$ \bar{s}_o = s_o – \frac{s_o^3}{24 r_o^2} = 6.2832 – \frac{6.2832^3}{24 * 40^2} $$
$$ = 6.2832 – \frac{248.15}{38400} \approx 6.2832 – 0.00646 \approx 6.2767 \text{ mm} $$
$$ \bar{h}_{a_o} = h_a + \frac{s_o^2}{4 r_o} = 4 + \frac{6.2832^2}{4 * 40} = 4 + \frac{39.48}{160} \approx 4 + 0.2468 \approx 4.2468 \text{ mm} $$
At small end:
$$ \bar{s}_i = s_i – \frac{s_i^3}{24 r_i^2} = 2.950 – \frac{2.950^3}{24 * 18.79^2} $$
$$ = 2.950 – \frac{25.66}{8470} \approx 2.950 – 0.00303 \approx 2.9470 \text{ mm} $$
$$ \bar{h}_{a_i} = h_a \cdot \frac{r_i}{r_o} + \frac{s_i^2}{4 r_i} = 4 * \frac{18.79}{40} + \frac{2.950^2}{4 * 18.79} $$
$$ = 1.879 + \frac{8.7025}{75.16} \approx 1.879 + 0.1158 \approx 1.9948 \text{ mm} $$
Allowances:
- Large-end allowance: Δs_o = 0.2 mm.
- Small-end allowance: Δs_i = Δs_o * (r_i / r_o) = 0.2 * (18.79 / 40) ≈ 0.0940 mm.
Rough milling dimensions:
- Large-end: chordal tooth thickness = s̄_o + Δs_o = 6.2767 + 0.2 = 6.4767 mm at chordal addendum ħ_a_o = 4.2468 mm.
- Small-end: chordal tooth thickness = s̄_i + Δs_i = 2.9470 + 0.0940 = 3.0410 mm at chordal addendum ħ_a_i = 1.9948 mm.
These values should be clearly specified on the工艺图纸 for the rough milling operation. By checking these dimensions during and after milling, we can ensure that the subsequent planing will have uniform material removal across the tooth profile, leading to a high-precision miter gear. This method is essential for批量生产 of miter gears, where consistency and accuracy are critical.
To generalize the process, I have compiled the key formulas in the table below for quick reference. This table summarizes the calculations for rough milling of miter gears based on pitch chordal dimensions. Note that for fixed chord dimensions, similar proportional scaling applies.
| Step | Calculation | Formula | Notes |
|---|---|---|---|
| 1 | Large-end pitch radius | $$ r_o = \frac{m z}{2} $$ | m is module, z is tooth count |
| 2 | Small-end pitch radius | $$ r_i = r_o – b \sin(\gamma) $$ | b is face width, γ is pitch cone angle |
| 3 | Large-end circular tooth thickness | $$ s_o = \frac{\pi m}{2} $$ | For standard tooth |
| 4 | Small-end circular tooth thickness | $$ s_i = s_o \cdot \frac{r_i}{r_o} $$ | Proportional scaling |
| 5 | Large-end chordal tooth thickness | $$ \bar{s}_o = s_o – \frac{s_o^3}{24 r_o^2} $$ | Approximation for chordal measure |
| 6 | Large-end chordal addendum | $$ \bar{h}_{a_o} = h_a + \frac{s_o^2}{4 r_o} $$ | h_a = m for standard addendum |
| 7 | Small-end chordal tooth thickness | $$ \bar{s}_i = s_i – \frac{s_i^3}{24 r_i^2} $$ | Similar to large end |
| 8 | Small-end chordal addendum | $$ \bar{h}_{a_i} = h_a \cdot \frac{r_i}{r_o} + \frac{s_i^2}{4 r_i} $$ | Addendum scales with radius |
| 9 | Large-end allowance | $$ \Delta s_o $$ | Chosen based on经验 |
| 10 | Small-end allowance | $$ \Delta s_i = \Delta s_o \cdot \frac{r_i}{r_o} $$ | Proportional to radius ratio |
| 11 | Rough milling large-end chordal tooth thickness | $$ \bar{s}_{o,\text{rough}} = \bar{s}_o + \Delta s_o $$ | To be milled |
| 12 | Rough milling small-end chordal tooth thickness | $$ \bar{s}_{i,\text{rough}} = \bar{s}_i + \Delta s_i $$ | To be milled |
In practice, when working with miter gears, it’s important to verify these calculations through simulation or trial cuts, especially for custom designs. The geometry of miter gears can be complex due to their conical shape, and factors such as backlash requirements and tooth contact patterns must be considered. However, the above method provides a reliable foundation for determining the rough milling dimensions.
Another aspect to consider is the inspection of the rough-milled miter gear. Since the chordal addendum and tooth thickness are used, standard gear measuring tools like gear calipers or coordinate measuring machines (CMM) can be employed. The chordal addendum is measured from the tip of the tooth to the chord across the tooth thickness at the pitch circle. For the large end, this is straightforward, but for the small end, care must be taken due to the smaller dimensions. In some cases, for very small miter gears, optical measurement might be preferred.
Moreover, the choice of allowance Δs_o depends on several factors: the material of the miter gear (e.g., steel, cast iron, or plastics), the hardness, the cutting tools used, and the desired surface finish. For instance, harder materials might require smaller allowances to reduce tool wear, while softer materials can tolerate larger allowances. From my experience, a good starting point for steel miter gears is Δs_o = 0.15 mm to 0.3 mm per side, but this should be adjusted based on actual machining conditions. It’s also crucial to ensure that the allowance is symmetric on both sides of the tooth to avoid imbalance in the finishing cut.
The translation method described here essentially creates a “thickened” tooth profile that is offset from the ideal profile. This can be visualized as shifting the entire tooth surface outward by the allowance amount. Mathematically, for a given point on the tooth profile with coordinates (x, y) in a cross-section, the rough milled profile is (x’, y’) where x’ = x + Δx and y’ = y + Δy, with Δx and Δy determined by the allowance and the tooth geometry. For simplicity, in the calculations above, we focus on the pitch circle tooth thickness, but the principle applies across the entire profile. This ensures that the finishing planing operation removes a uniform layer, preserving the accuracy of the miter gear’s tooth form.
When dealing with批量生产 of miter gears, consistency is key. The rough milling process must be tightly controlled to ensure that every gear blank has the same allowances. This requires precise setup of the milling machine, often using CNC (Computer Numerical Control) for repeatability. For traditional manual milling, jigs and fixtures are essential to maintain the correct alignment and depth of cut. The calculations provided here feed into the CNC program or the setup instructions for the machinist.
In addition to the pitch chordal method, the fixed chord method is also widely used, especially for inspection. As mentioned earlier, the fixed chord tooth thickness is independent of tooth count for a given module and pressure angle. This makes it a convenient reference for quality control. The formulas for fixed chord dimensions are:
$$ s_c = m \cos^2 \alpha $$
$$ h_c = m \left(1 – \frac{\pi}{8} \sin 2\alpha \right) $$
For a miter gear, if the drawing specifies these, the rough milling dimensions would be s_c + Δs_c at the fixed chord addendum h_c, with Δs_c scaled similarly. Since the fixed chord is defined at a specific height on the tooth, it’s crucial to ensure that the milling cutter is set to the correct depth to achieve this. In practice, many gear manufacturers prefer the fixed chord method for its simplicity in measurement.
Now, let’s discuss some practical tips for implementing this in a shop floor environment. First, always start with a verified gear design. Check the miter gear drawing for all critical dimensions: module, pressure angle, number of teeth, face width, and cone distance. If the cone distance is not directly given, it can be calculated from the pitch diameter and pitch cone angle. For miter gears, the pitch cone angle is often 45°, but confirm this from the drawing. Next, determine the finishing allowance based on the material and tooling. Consult machining handbooks or internal standards. Then, perform the calculations as outlined, double-checking each step. Use software or spreadsheets to automate the calculations for different gear sizes, especially when dealing with multiple batches of miter gears.
During the rough milling operation, set up the gear blank securely on the milling machine. For bevel gears, the blank is typically mounted at an angle equal to the pitch cone angle to mill the teeth along the cone. This is done using a dividing head or a rotary table set to the appropriate angle. The milling cutter, usually a form cutter matching the tooth profile, is then fed into the blank to the calculated depths. For each tooth, the cutter should be positioned to mill the chordal tooth thickness at the correct addendum. After milling a few teeth, inspect the chordal dimensions using gear calipers. Adjust the setup if necessary to meet the calculated rough milling dimensions.
It’s also important to consider the tooth spacing during rough milling. The dividing mechanism must be accurate to ensure equal spacing of teeth. Any error here will affect the gear’s performance. For miter gears, which are often used in precision applications, even small errors can lead to noise and vibration. Therefore, regular calibration of the dividing equipment is essential.
After rough milling, the gear blank proceeds to the planing operation. The planing machine, such as a gear planer or shaper, uses a tool that reciprocates to generate the exact tooth profile. Because the rough-milled tooth has uniform allowances, the planing tool can remove material evenly, resulting in a precise tooth form with minimal variation. This method not only improves accuracy but also extends tool life by reducing uneven wear on the planing tool.
In conclusion, the calculation of tooth thickness for rough milling of miter gears is a critical step in the manufacturing process. By translating the ideal tooth profile by a determined allowance, we ensure that the finishing operation has a consistent material layer to work with. This method, supported by formulas and tables, allows for precise control over the gear dimensions. Whether using pitch chordal or fixed chord measurements, the key is to proportionally scale the allowances from the large end to the small end. As a gear engineer, I have found this approach indispensable for producing high-quality miter gears in批量生产. It not only preserves the accuracy of the finishing machines but also enhances the overall efficiency and reliability of the gear manufacturing process. By following these guidelines and incorporating regular inspection, manufacturers can achieve tight tolerances and excellent performance in their miter gear applications.