
In my research and practical application within mechanical design, I have found that the design and modeling of screw gears, specifically worm and worm gear drives, present a unique set of challenges. These components are fundamental for transmitting motion and power between non-intersecting, perpendicular shafts, offering high reduction ratios and compact design possibilities. Traditional 2D drafting methods for these complex geometries are not only time-consuming but also prone to error, limiting innovation and rapid prototyping. The advent of advanced 3D CAD software has revolutionized this process. In this article, I will detail my comprehensive approach to achieving precise, parametric three-dimensional modeling of screw gears using SolidWorks and its API, driven by Visual Basic. The primary goal is to create a robust, automated workflow that generates accurate solid models directly from fundamental design parameters, thereby providing a perfect digital foundation for subsequent engineering analyses such as Finite Element Analysis (FEA), dynamic mechanism simulation, and CNC toolpath generation.
1. Mathematical Foundation for Screw Gear Modeling
Accurate 3D modeling must be rooted in precise mathematical definitions. For screw gears, this involves defining the geometry of both the worm (the screw) and the worm wheel. The most common type in industrial applications is the Archimedean worm, whose thread profile is based on a trapezoidal section.
The worm thread can be generated by sweeping a specific tooth profile along a helical path. The cross-sectional profile of the worm’s tooth space (or thread groove) is defined by key points, as derived from the basic gear parameters. Let’s establish the mathematical model. The axial pitch, $p_x$, is the fundamental distance:
$$p_x = \pi m$$
where $m$ is the module. The dedendum, $h_f$, and addendum, $h_a$, for the worm thread are:
$$h_f = 1.2m \quad \text{(typically, using a dedendum coefficient } h_f^* = 1.2\text{)}$$
$$h_a = 1.0m \quad \text{(typically, using an addendum coefficient } h_a^* = 1.0\text{)}$$
The reference diameter of the worm is given by:
$$d_1 = m q$$
where $q$ is the diameter factor. The coordinates of the trapezoidal groove profile in its local plane can be calculated. If we set the profile’s vertical centerline at the worm’s axis, the coordinates $(x_i, y_i)$ for the key points are:
$$
\begin{aligned}
x_1 &= \frac{p_x}{4} – h_f \tan(\alpha) = \frac{\pi m}{4} – 1.2m \tan(\alpha) \\
y_1 &= \frac{d_1}{2} – h_f = \frac{mq}{2} – 1.2m \\[4pt]
x_2 &= \frac{p_x}{4} + h_a \tan(\alpha) = \frac{\pi m}{4} + m \tan(\alpha) \\
y_2 &= \frac{d_1}{2} + h_a = \frac{mq}{2} + m \\[4pt]
x_3 &= -x_2, \quad y_3 = y_2 \\
x_4 &= -x_1, \quad y_4 = y_1
\end{aligned}
$$
Here, $\alpha$ is the pressure angle. Connecting points 1-2-3-4-1 forms the closed profile to be swept. The guiding path is a helix with its base circle diameter equal to the worm’s reference diameter $d_1$ and a lead $L_{worm}$ equal to the travel of one complete thread:
$$L_{worm} = z_1 p_x = \pi m z_1$$
where $z_1$ is the number of worm threads (starts).
Modeling the worm wheel is more complex because its tooth profile in a plane perpendicular to its axis is an involute curve, but it is enveloped by the worm’s thread. For accurate 3D modeling, I approximate the worm wheel’s tooth space by creating an involute profile on a specific plane and sweeping it along a helix that matches the mating worm’s geometry. The involute curve of a gear with reference diameter $d_2 = m z_2$ (where $z_2$ is the number of teeth on the worm wheel) and base diameter $d_{b2} = d_2 \cos(\alpha)$ is defined parametrically. For any point on the involute at radius $r_k$ (where $r_f \le r_k \le r_a$), the angle from the start of the involute is:
$$\theta_k = \inv(\alpha_k) = \tan(\alpha_k) – \alpha_k \quad \text{where} \quad \alpha_k = \arccos\left(\frac{d_{b2}}{2r_k}\right)$$
To position this curve correctly for the worm wheel tooth slot, a phase shift $\varphi$ and coordinate transformation are required. The center distance $a$ between the screw gears is:
$$a = \frac{d_1 + d_2}{2} = \frac{m(q + z_2)}{2}$$
The transformed coordinates $(x’, y’)$ for the involute point in the sketch plane, which is offset from the worm wheel’s central plane, become:
$$
\begin{aligned}
x’ &= -r_k \sin(\varphi + \theta_k) \\
y’ &= a – r_k \cos(\varphi + \theta_k) \\
\text{where} \quad \varphi &= \frac{\pi}{2z_2} – \tan(\alpha) + \alpha
\end{aligned}
$$
By calculating a series of points $(x’, y’)$ for $r_k$ ranging from the root radius to the tip radius, a spline can be fitted to approximate the true involute profile. This profile is then mirrored to create a symmetric tooth slot shape.
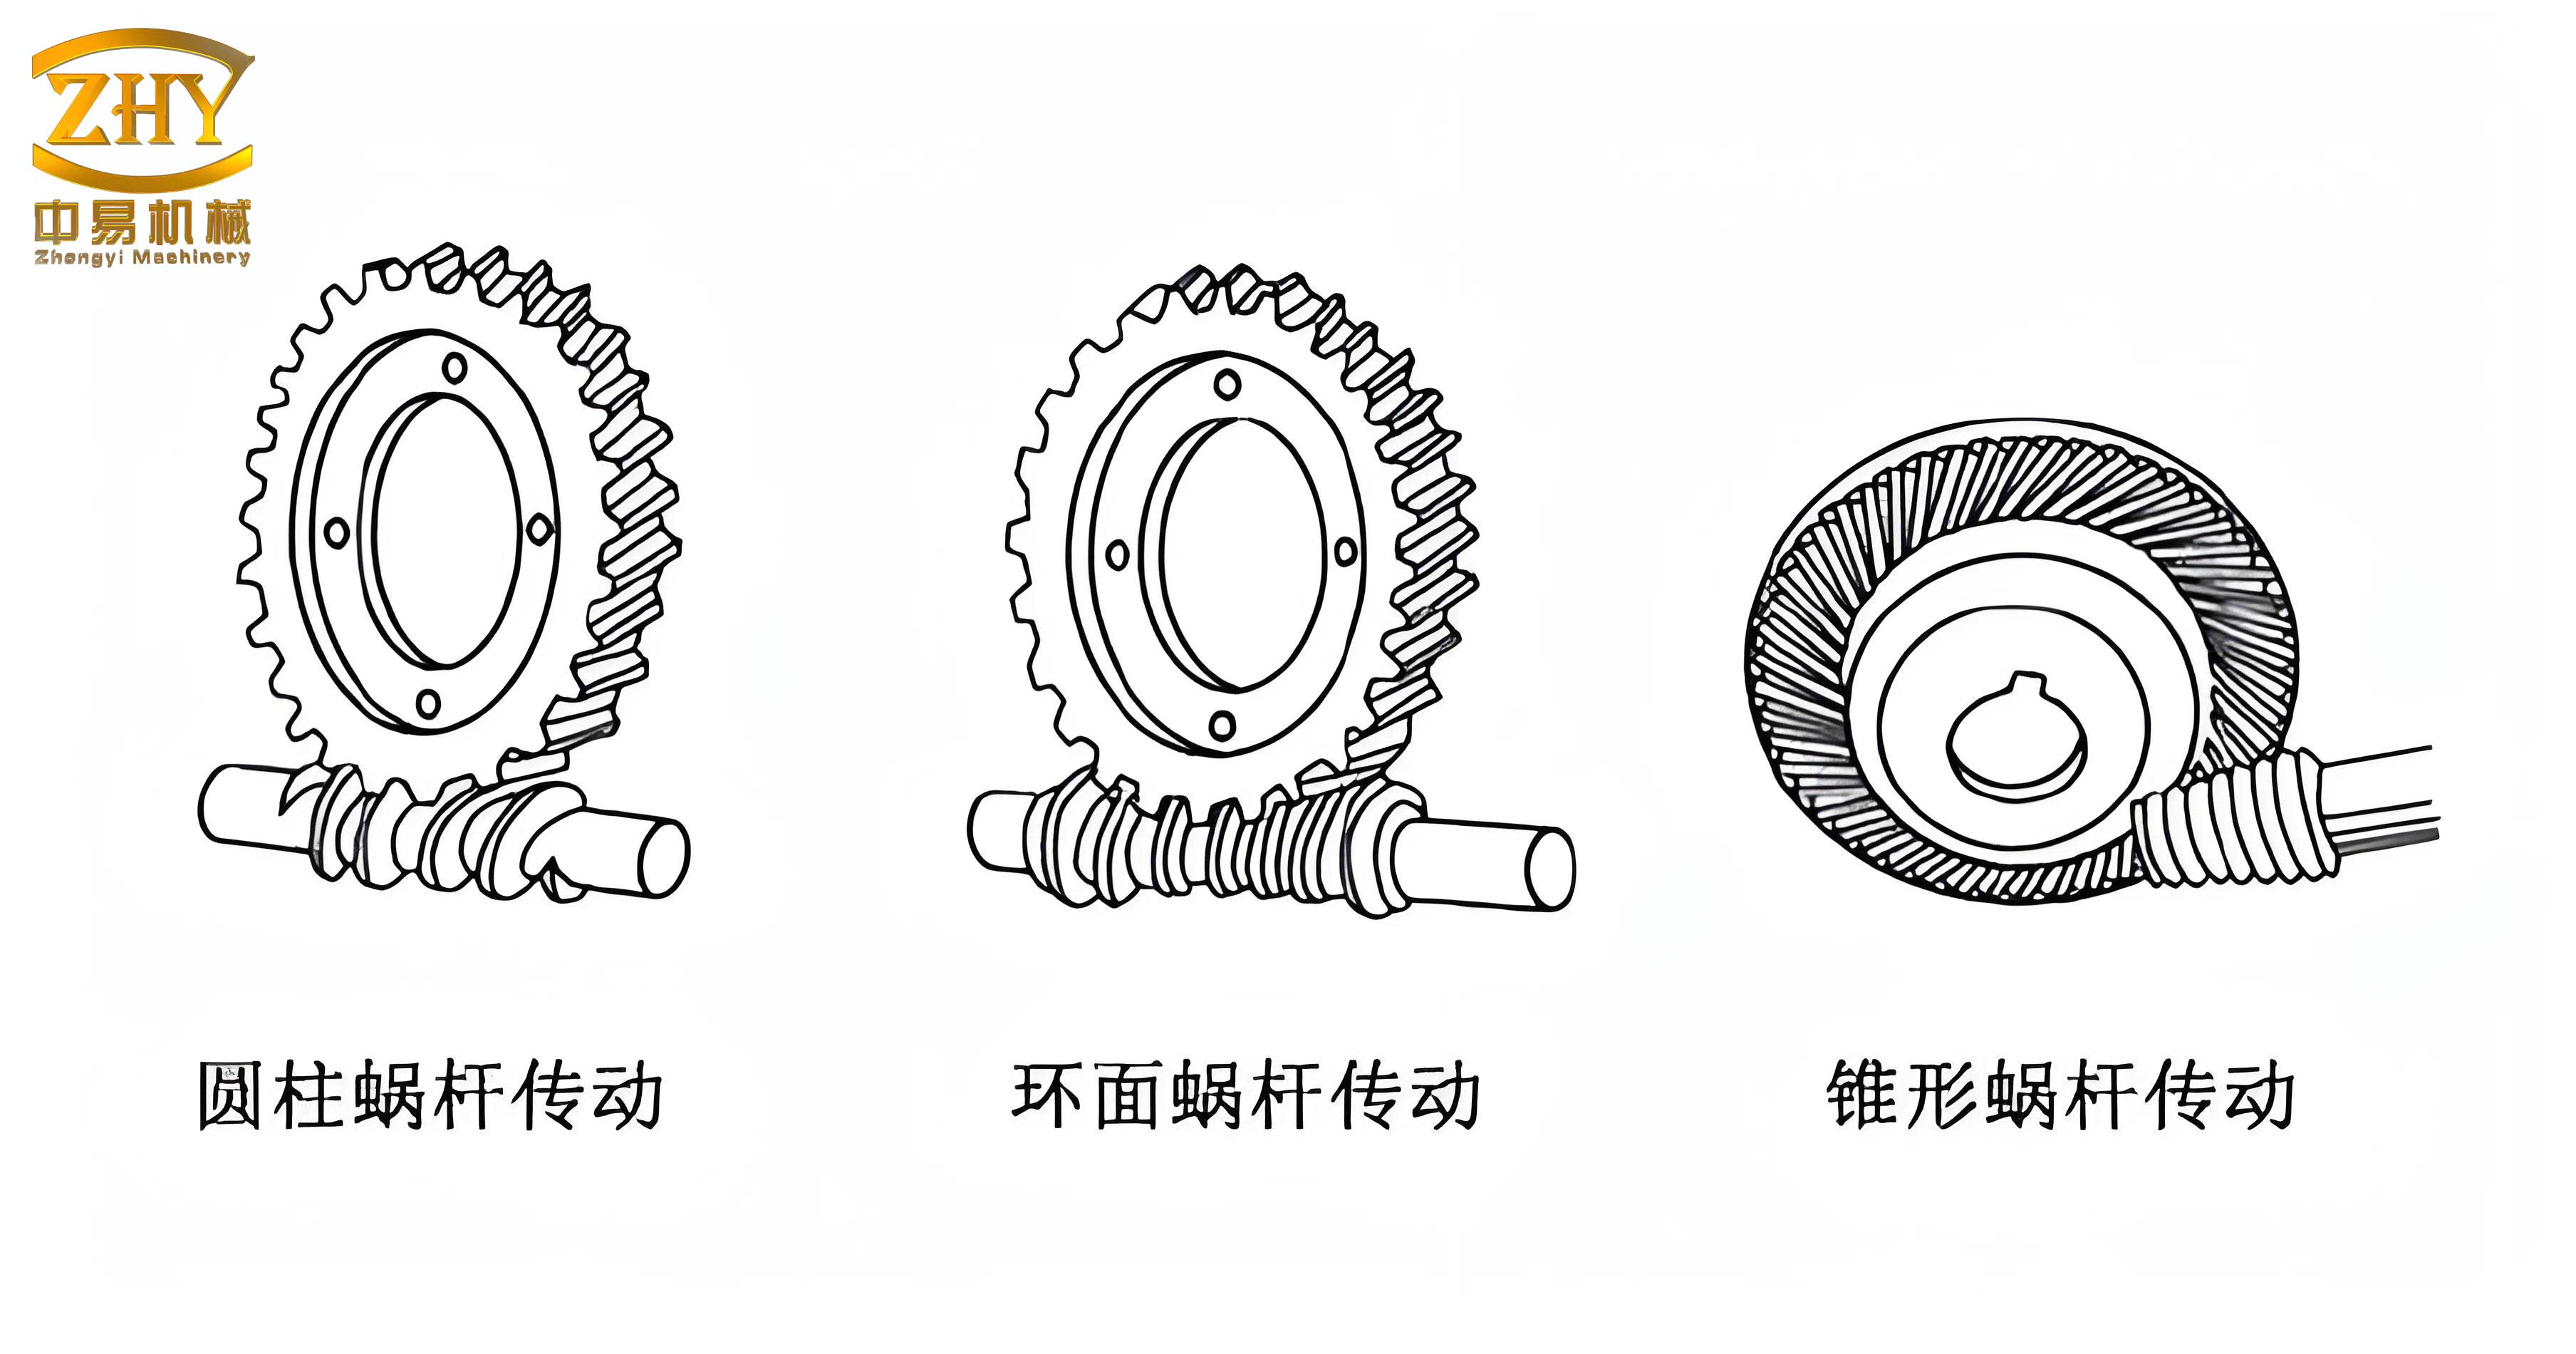
2. Parametric Modeling Strategy and Implementation in SolidWorks
The implementation of this mathematical model into an automated 3D modeling system requires a structured programming approach. I chose Visual Basic for Applications (VBA) to drive SolidWorks via its Application Programming Interface (API) due to its accessibility and seamless integration.
2.1 Overall Programming Architecture
The program flow follows a logical sequence to ensure reliable model generation every time. The core steps are as follows, often controlled through a user form for parameter input.
| Step | Description | Key Actions & API Functions |
|---|---|---|
| 1. Declaration & Initialization | Set up the SolidWorks application object, define all variables (doubles, integers, strings, objects). | `Set swApp = CreateObject(“SldWorks.Application”)`, `Dim` statements. |
| 2. Parameter Input | Present a dialog box for the user to input the fundamental design parameters for the screw gears. | UserForm with TextBoxes for `m`, `alpha`, `z1`, `z2`, `q`, etc. |
| 3. Derived Calculation | Compute all necessary geometric dimensions from the input parameters using the standardized formulas. | Code implementation of equations for `d1`, `d2`, `a`, `px`, `ha`, `hf`. |
| 4. Worm Solid Creation | Generate the 3D solid model of the worm shaft with its threaded section. | `Part.Extension.SelectByID2`, `Part.CreateCircle2`, `FeatureExtrusion2`, `InsertHelix`, `InsertCutSweep2`. |
| 5. Worm Wheel Solid Creation | Generate the 3D solid model of the worm wheel with its correctly formed, helically arranged teeth. | `CreatePlaneAtOffset3`, sketch splines from calculated points, `InsertCutSweep2`, `FeatureCircularPattern`. |
2.2 Creating the Worm (Screw) Model
The process for modeling the worm is a direct application of the sweep-cut feature. First, I create a cylindrical blank based on the worm’s tip diameter and thread length. Then, I precisely sketch the tooth groove profile on a plane (e.g., the Front Plane). Using the API, I convert the calculated coordinates into sketch lines.
“`vb
‘ Example snippet for creating the worm groove profile sketch
boolStatus = Part.Extension.SelectByID2(“Front Plane”, “PLANE”, 0, 0, 0, False, 0, Nothing, 0)
Part.SketchManager.InsertSketch True
Part.CreateLine2(-x1, y1, 0, x1, y1, 0)
Part.CreateLine2(x1, y1, 0, x2, y2, 0)
Part.CreateLine2(x2, y2, 0, -x2, y2, 0)
Part.CreateLine2(-x2, y2, 0, -x1, y1, 0)
Part.SketchManager.InsertSketch True
“`
Next, the helical path is created. I sketch a circle with a diameter equal to the worm’s reference diameter $d_1$ on the Right Plane and then use the `InsertHelix` method. The critical parameters are the defined by height and pitch, or by pitch and number of revolutions. To ensure the helix runs the length of the worm’s threaded portion, I set it by height and pitch.
“`vb
‘ Example snippet for creating the guide helix
boolStatus = Part.Extension.SelectByID2(“Right Plane”, “PLANE”, 0, 0, 0, False, 0, Nothing, 0)
Part.CreateCircle2(0, 0, 0, d1 / 2, 0, 0) ‘ Sketch the base circle
Part.SketchManager.InsertSketch True
Dim helixDef As Object
Set helixDef = Part.FeatureManager.InsertHelix(False, True, False, True, 2, wormLength, px, 0, 0, 0)
‘ Parameters: 2 = Defined by Height and Pitch, wormLength = height, px = pitch
“`
Finally, the sweep-cut operation is performed. I select the groove profile sketch as the contour and the helix as the path. Executing this creates one complete thread groove. A circular pattern of this cut feature, with an instance count equal to the number of worm threads $z_1$, completes the active threaded section of the screw gear.
2.3 Creating the Worm Wheel Model
Modeling the worm wheel is the more intricate part of creating the screw gear set. The challenge lies in defining the correct sketch plane and the cutting contour. The sketch plane for the tooth slot profile must be parallel to the worm’s axis and tangent to its reference cylinder. In practice, this means creating a plane offset from the wheel’s central plane by the center distance $a$.
“`vb
‘ Create reference plane for the worm wheel tooth profile
boolStatus = Part.Extension.SelectByID2(“Top Plane”, “PLANE”, 0, 0, 0, False, 0, Nothing, 0)
Part.CreatePlaneAtOffset3(a, False, True) ‘ Offset by center distance ‘a’
boolStatus = Part.Extension.SelectByID2(“Plane1”, “PLANE”, 0, 0, 0, False, 0, Nothing, 0)
Part.SketchManager.InsertSketch True
“`
On this plane, I generate the involute profile. This involves a loop to calculate discrete points $(x’, y’)$ using the transformed involute equations for a range of $r_k$ values. These points are fed into the `SketchSpline` method to create a curve.
“`vb
‘ Loop to calculate and create involute spline points
For i = 0 To numberOfPoints
rk = rootRadius + (tipRadius – rootRadius) * (i / numberOfPoints)
alpha_k = ArcCos(baseRadius / rk)
theta_k = Tan(alpha_k) – alpha_k
x_prime = -rk * Sin(phi + theta_k)
y_prime = a – rk * Cos(phi + theta_k)
Part.SketchSpline numberOfPoints – i, x_prime, y_prime, 0
Next i
“`
A mirroring operation across a centerline creates the second flank of the tooth slot, and lines are added to close the contour at the tip and root diameters. The cutting path for this profile is again a helix, but its parameters are crucial: its axis must be concentric with the worm’s axis (not the wheel’s), its base diameter is $d_1$, its pitch is $p_x$, and its height must be sufficient to cut through the wheel’s rim. To create a full tooth space, the helix should revolve exactly 0.5 turns (180 degrees) if the profile is symmetric; this ensures the swept cut starts and ends correctly at the edges of the wheel’s face width.
“`vb
‘ Create the helical path for the worm wheel cut (on a sketch relative to worm axis)
boolStatus = Part.Extension.SelectByID2(“Right Plane”, “PLANE”, 0, 0, 0, False, 0, Nothing, 0)
Part.CreateCircle2(0, a, 0, d1/2, 0, 0) ‘ Circle offset by center distance ‘a’
Part.SketchManager.InsertSketch True
Part.FeatureManager.InsertHelix False, False, False, True, 0, px/2, px, 0.5, 0, 3.14159265359
‘ Parameters: 0 = Defined by Pitch and Revolution, 0.5 Revolutions, px = Pitch, 180deg start angle.
“`
Performing the sweep-cut with this profile and path creates one perfectly formed helical tooth space in the wheel blank. The final step is to pattern this cut feature circularly around the wheel’s axis with $z_2$ instances, completing the toothed geometry of this screw gear component.
3. Design Implementation and Verification
With the program architecture in place, the actual design process for a new set of screw gears becomes highly efficient. I begin by launching the custom SolidWorks macro and inputting the required parameters into the form. For a typical power transmission screw gear set, the parameters might be as follows:
| Parameter | Symbol | Example Value |
|---|---|---|
| Module | $m$ | 3.0 mm |
| Pressure Angle | $\alpha$ | 20° |
| Number of Worm Starts | $z_1$ | 2 |
| Number of Wheel Teeth | $z_2$ | 30 |
| Worm Diameter Factor | $q$ | 10 |
| Center Distance | $a$ | 60 mm (calculated) |
| Face Width of Wheel | $b$ | 25 mm |
Upon clicking “Generate,” the macro executes the sequence. It first calculates all derived values:
$$d_1 = m \times q = 3.0 \times 10 = 30.0 \text{ mm}$$
$$d_2 = m \times z_2 = 3.0 \times 30 = 90.0 \text{ mm}$$
$$a = \frac{m(q + z_2)}{2} = \frac{3.0 \times (10 + 30)}{2} = 60.0 \text{ mm}$$
$$p_x = \pi m = \pi \times 3.0 \approx 9.425 \text{ mm}$$
These values are then used by the SolidWorks API calls to generate the geometry. Within seconds, two new part documents are created and populated with the fully defined worm and worm wheel solids. I can immediately verify the mesh by performing a simple interference check in an assembly, confirming that the thread of the screw gear engages perfectly with the tooth spaces of the wheel without any clipping or excess gap. The parametric nature means that modifying any input value and re-running the macro will correctly propagate all changes through the entire model, updating every related sketch, feature, and dimension. This is the true power of this automated approach to screw gear design.
4. Advanced Applications and Integration
The accurate solid models generated by this parametric system are not endpoints but rather the essential starting points for a full digital engineering workflow. The precision of the geometry ensures the validity of downstream applications.
Finite Element Analysis (FEA): The 3D models can be directly imported into simulation environments like SolidWorks Simulation or ANSYS. The complex contact surfaces between the screw gear teeth are perfectly defined, allowing for accurate static structural analysis to determine stress concentrations, contact pressures, and bending stresses under load. Meshing these detailed geometries is straightforward because they are feature-based solids rather than imported mesh data.
Dynamic Kinematics and Dynamics Simulation: The screw gear models can be assembled with appropriate mates (gear mate with a specified ratio) in SolidWorks Motion or similar multi-body dynamics software. This allows me to simulate the real motion of the drive, analyze angular velocities, check for smooth operation, and calculate dynamic loads, power transmission efficiency, and inertia effects. The realistic geometry is critical for visualizing the interaction and identifying potential mechanical issues like undercutting or tip interference during rotation.
CNC Machining and Manufacturing: Perhaps one of the most valuable applications is in manufacturing. The 3D model of the worm wheel, in particular, serves as the perfect reference for generating CNC toolpaths. Using CAM software, I can program a 3-axis or multi-axis milling machine to cut the precise helical tooth spaces into a gear blank. For the worm, the model can guide thread grinding or whirling operations. The digital model ensures the manufactured physical screw gears will match the design intent exactly, reducing trial and error and scrap rates.
This integrated digital thread—from parametric design to analysis, simulation, and manufacturing—exemplifies the modern approach to mechanical component development. The screw gear set, with its intricate geometry, benefits tremendously from this holistic, model-centric workflow.
5. Conclusion
In this detailed exploration, I have presented a complete methodology for the parametric three-dimensional design of screw gears. By establishing a rigorous mathematical model for both the worm and worm wheel and implementing it through the SolidWorks API using Visual Basic, I have created an automated system that translates basic gear parameters into precise, editable solid models. This approach eliminates the tedium and potential inaccuracies of manual modeling for these complex components. The resulting digital models are mathematically correct and feature-rich, making them directly usable for advanced engineering tasks. The successful implementation of this system underscores the significant advantages of parametric CAD and API-driven customization in mechanical design. It empowers engineers to rapidly iterate designs, explore “what-if” scenarios by changing parameters, and seamlessly integrate the screw gear design into broader digital prototyping and manufacturing processes, thereby accelerating innovation and improving reliability in the development of power transmission systems.